

Google SSO
This guide provides step-by-step instructions for Google Workspace administrators to enable Google Single Sign-On (SSO) for access to Inflection’s web portal.Part 1: Set up Google workspace for SAML
Part 1: Set up Google workspace for SAML
Prerequisites
Prerequisites
- Google Workspace administrator account with super admin privileges
- A verified domain in Google Workspace
- User accounts set up in Google Workspace
Add SAML app
Add SAML app
- Open Google Admin console (https://admin.google.com) → Apps → Web and mobile apps → Add app → Add custom SAML app
-
App details
- Name: Inflection
- (Optional) Description and logo
- Click Continue
-
Download IdP info (from the Google IdP Information step)
- Either Download Metadata or copy:
- SSO URL (a URL like
https://accounts.google.com/o/saml2/idp?idpid=...). - Entity ID / Issuer (Google shows a similar URL).
- Certificate (X.509). You will paste this in Inflection later.
- SSO URL (a URL like
- Click Continue
- Either Download Metadata or copy:
-
Service provider details
- ACS URL:
https://auth.inflection.io/api/v1/saml/sso2 - Entity ID:
https://auth.inflection.io - Start URL: (leave blank)
- Signed response: Checked
- Name ID format: Email
- Name ID: Basic Information → Primary email
- Click Continue
- ACS URL:
-
Attribute mapping (Add Mapping)
- Save
-
Turn on for users
- On the app’s main page, click User access and turn ON for everyone or for specific users/Groups.
Part 2: Enable SSO Login in Inflection
Part 2: Enable SSO Login in Inflection
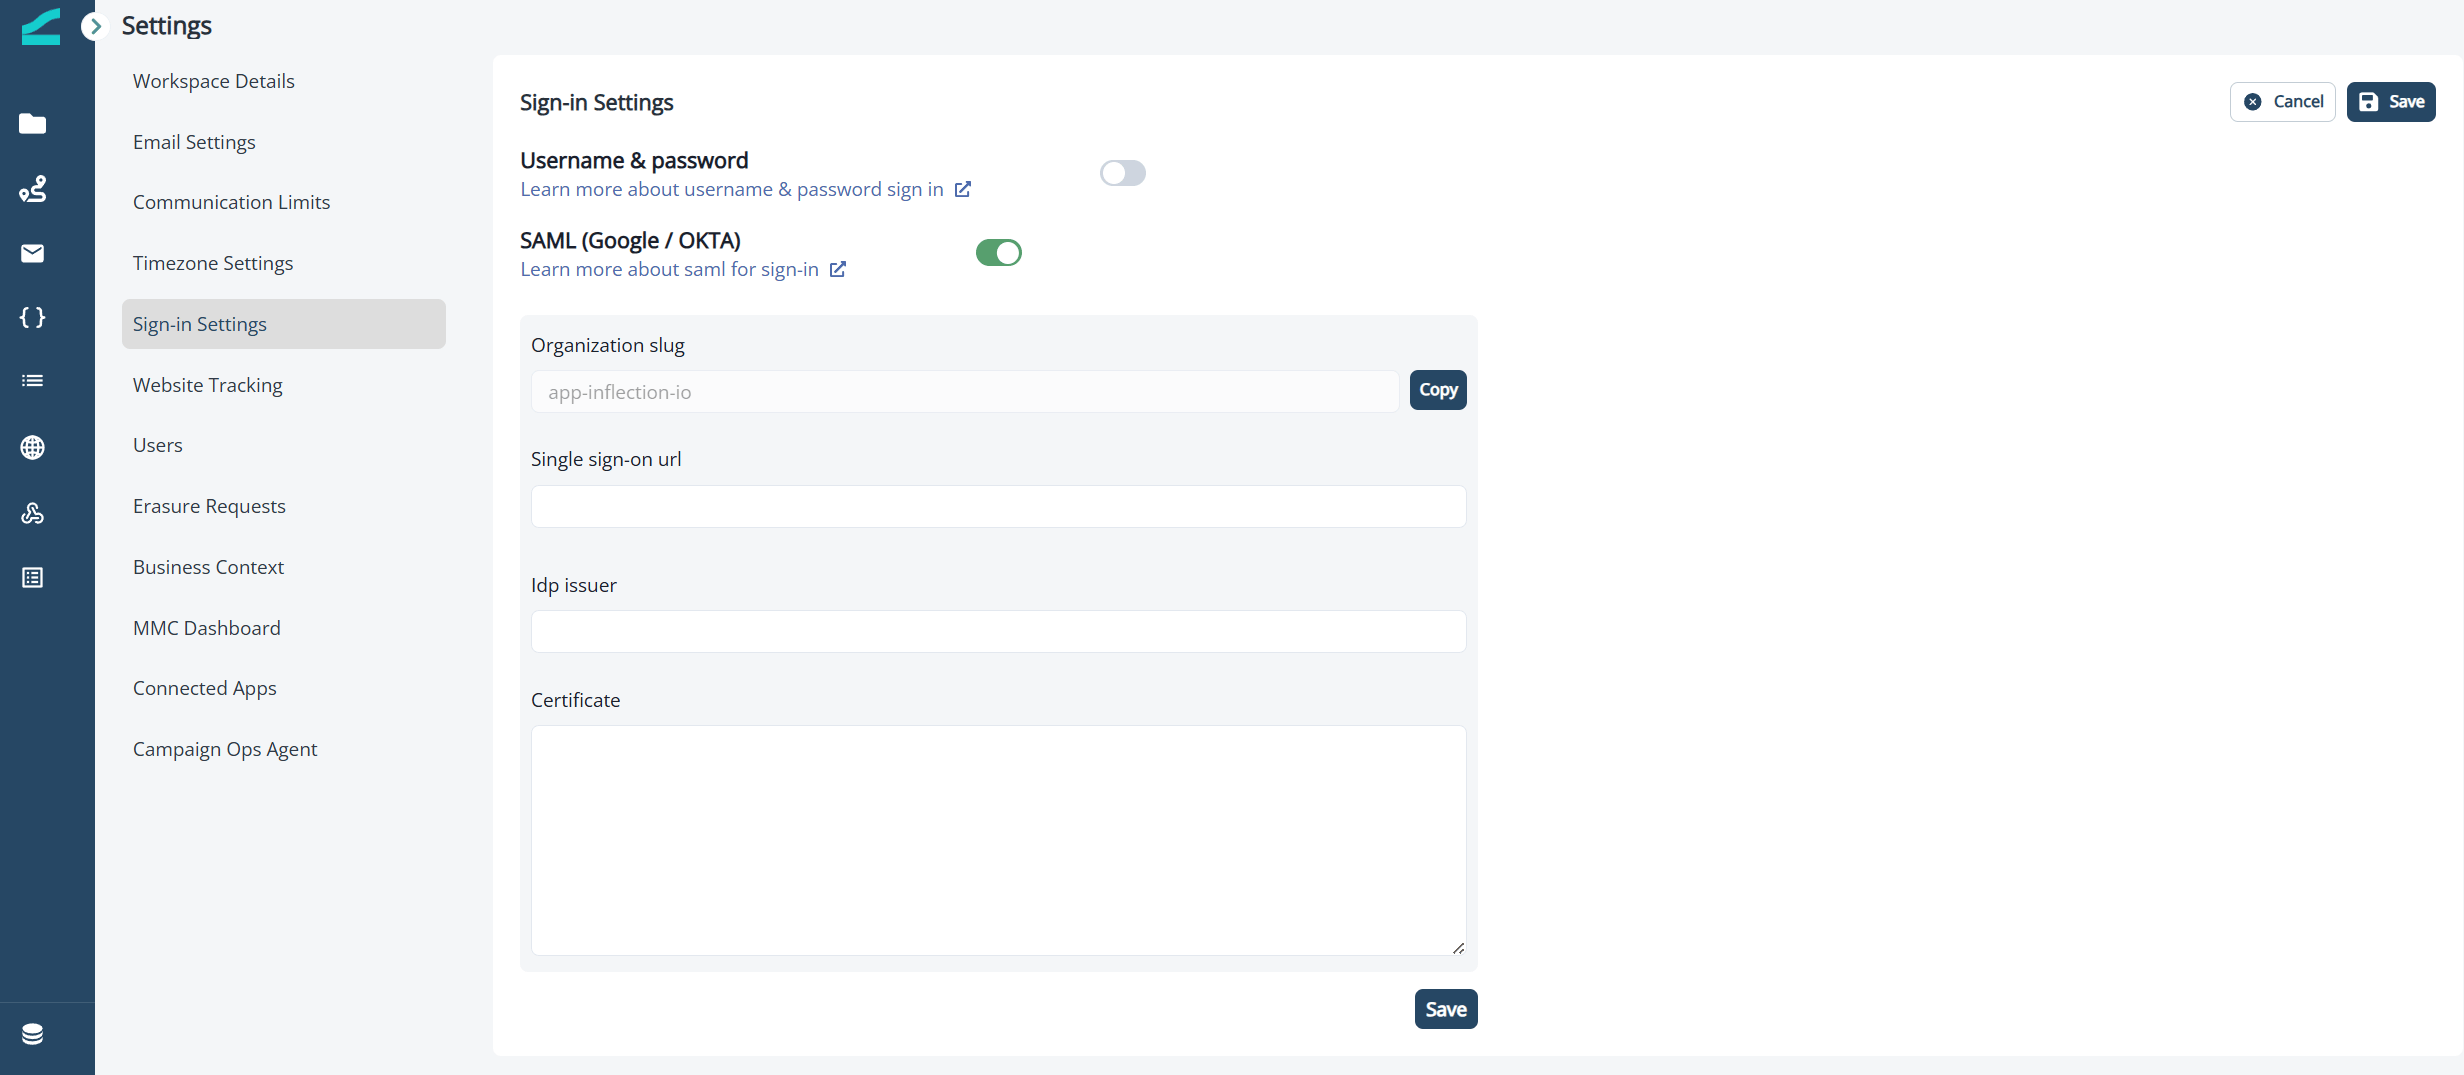
In Inflection, navigate to Settings > Single Sign-on.In the Single Sign-on section, enable SAML. Then enter:
-
Single sign-on URL: This is the SSO URL from the google admin page, typically of the form
https://accounts.google.com/o/saml2/idp?idpid=xxxxxxxxx - Issuer: This is the Entity ID entry from the google admin page, typically of the form accounts.google.com
-
Certificate: Paste the contents of the certificate downloaded from google. Note: Ensure that the contents start with
---BEGIN CERTIFICATE---and end with--END CERTIFICATE--for it to be parsed properly -
Click Save
Part 3: Test the setup
Part 3: Test the setup
Step 1: Set Access Controls
- Specify which user groups can access the application in Google admin console
- Define role-based access if applicable
Step 2: Test the Configuration
- Test the SSO setup with a test user account before rolling it out to all users
- Verify that the user can use sign-up with Google on app.inflection.io, log in with their google credentials and see a fully populated inflection homepage on successful login
Step 3: Deploy to Users
- Once testing is successful, deploy the SSO configuration to all intended users
- Monitor for any authentication issues during the initial rollout
Additional Resources
Additional Resources
Common issues & quick fixes
Common issues & quick fixes
app_not_configured_for_user- The user isn’t assigned to the SAML app. Turn the app ON for that user’s Organizational Unit or group.
- Audience / Entity ID mismatch
- Ensure Entity ID in Google is exactly
https://auth.inflection.io(no trailing slash). Re‑save and try again.
- Ensure Entity ID in Google is exactly
- Recipient / ACS mismatch
- Ensure ACS URL is exactly
https://auth.inflection.io/api/v1/saml/sso2.
- Ensure ACS URL is exactly
Response is not signed- In the SAML app → Service provider details, ensure Signed response is checked (this guide assumes it is ON).
- Attribute issues
- Attribute mappings must include: Primary email →
email, First name →name.
- Attribute mappings must include: Primary email →
- Clock/time errors (rare scenario)
- Ensure devices and IdP time are in sync.
What Inflection receives
- NameID: the user’s primary email
- Attributes:
email: user’s primary emailname: user’s first name
Okta SSO
This guide provides step-by-step instructions for Google Workspace administrators to enable Okta Single Sign-On (SSO) for access to Inflection’s web portal.This setup might fail without parameter values that are customized for your organization. Please use the Okta Administrator Dashboard to add an application and view the values that are specific for your organization.
Enabling SAML will affect all users who use this application, which means that users will not be able to sign in through their regular sign-in page. They will be able to access the app through the Okta service.Inflection.io doesn’t provide a backup sign-in URL where users can sign in using their regular username and password. You can contact Inflection.io Support (team@inflection.io) to turn off SAML, if necessary.
Supported Features
Supported Features
The Okta/Inflection.io SAML integration currently supports the following features:
- SP-initiated SSO
- IdP-initiated SSO
- JIT (Just In Time) Provisioning
Configuration Steps
Configuration Steps
Okta Admins
Okta Admins
- From the Okta Admin dashboard, click Admin button
- Click Applications > Applications
- Click Browse App Catalog
- Search for and Select Inflection in Browse App Integration Catalog
- Click Add Integration and Click Done
- Under Assign tab, add the Okta users that must be granted access to Inflection and Save
- Click Sign On tab, then click Edit.
-
Encryption Certificate: Save the following encryption certificate as encryption.crt then upload it to Okta.
- Scroll down to Advanced Sign-on Settings.
- Enter your Organisation Slug (Get it from inflection app → Settings page → Single Sign-on) into the corresponding field.
- Application username format: Select Email.
- Click Save.
- Done!
Inflection Admins
Inflection Admins
- Login to inflection account
- Navigate to Settings
- Choose Single Sign-on
- Single Sign-On URL
- IDP Issuer
-
Certificate
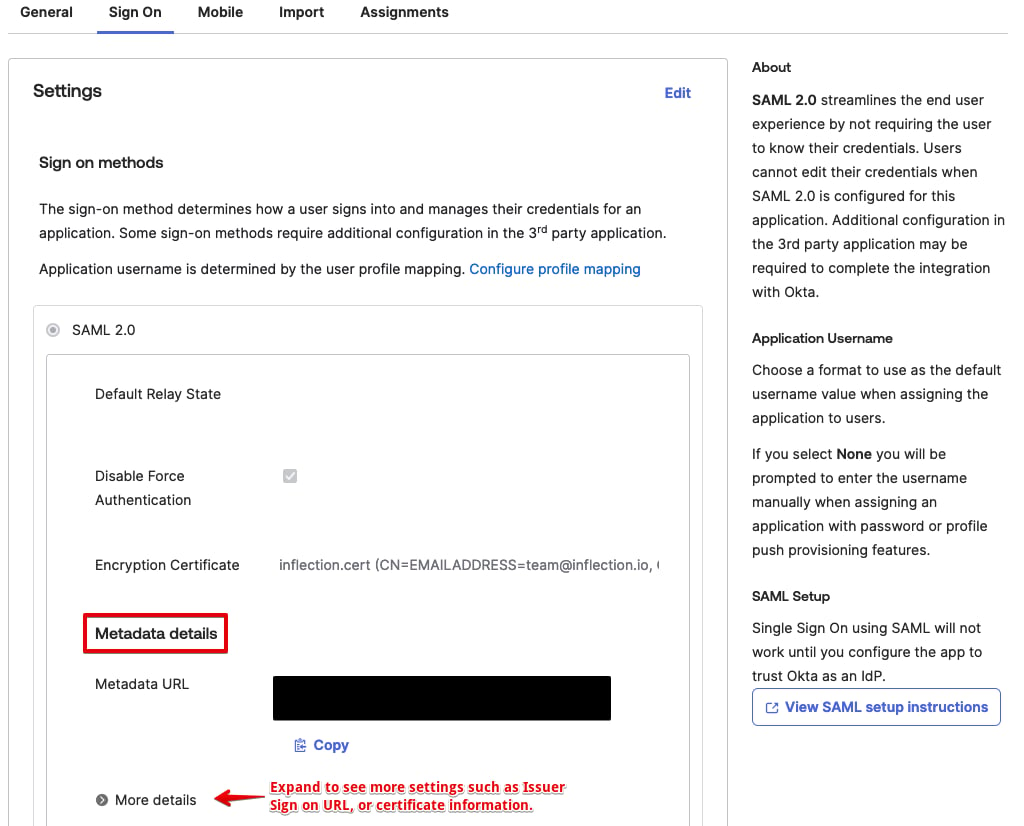
-
Single Sign-On URL: Copy and paste the following:
Sign On tab of the Inflection Okta Application under “Metadata Details” >> Sign on URL -
IDP Issuer: Copy and paste the following:
Sign On tab of the Inflection Okta Application under “Metadata Details” >> Issuer -
Certificate: Copy and paste the following:
Sign On tab of the Inflection Okta Application under “Metadata Details” >> Signing Certificate - Click Save Changes.
- Logout
- And log back In. This time Okta SSO login will be prompted
SP-initiated SSO
SP-initiated SSO
- Go to: https://app.inflection.io/login/start
- Enter your email, then click Continue