Importing contacts via CSV enables you to efficiently populate your database with existing contact lists while maintaining full control over field mapping and list organization. Use CSV imports to create new contacts, update existing records, or both—streamlining your data management and ensuring your contact database stays current.

CSV Minimum Requirements

  • A column with at least one valid email ID
  • A complete header row
  • < 500 MB file size
By importing contacts via CSV or any other means into Inflection, you agree to our anti-spam policy

Upload Contacts Using CSV Files

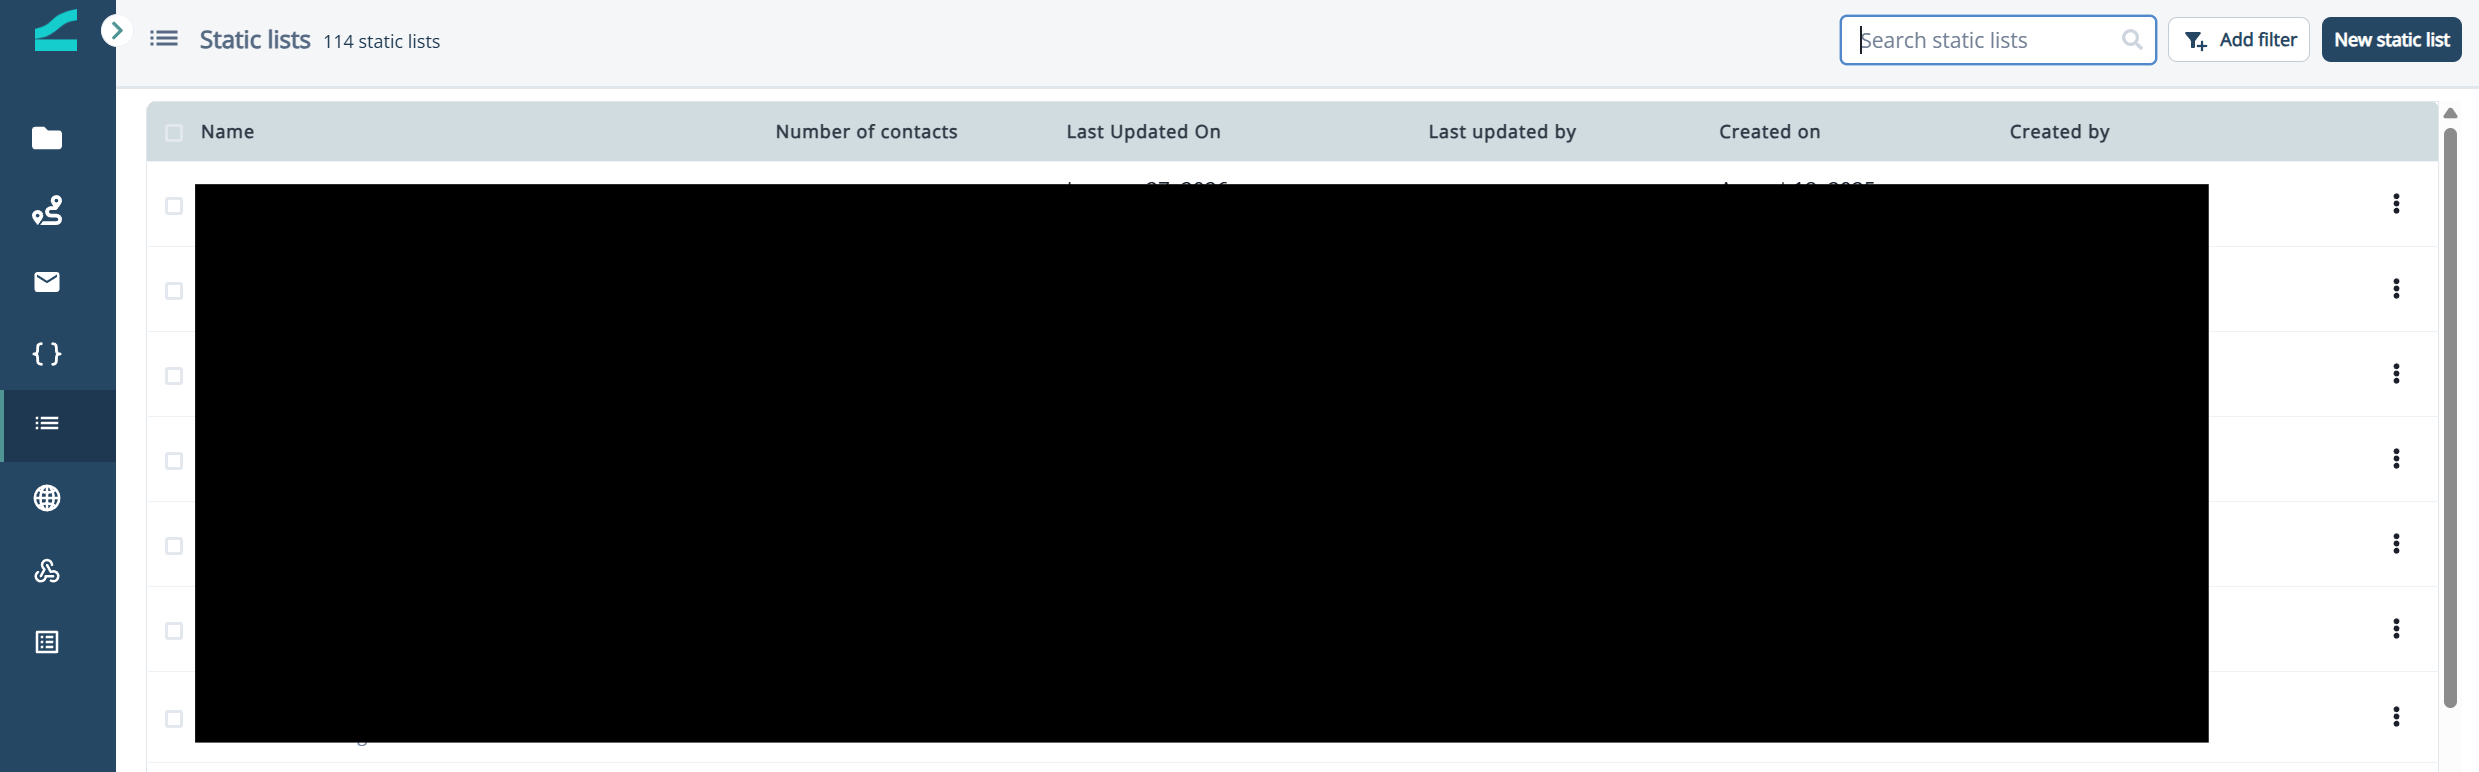
  1. Navigate to Static Lists from the sidebar. Static Lists in the sidebar
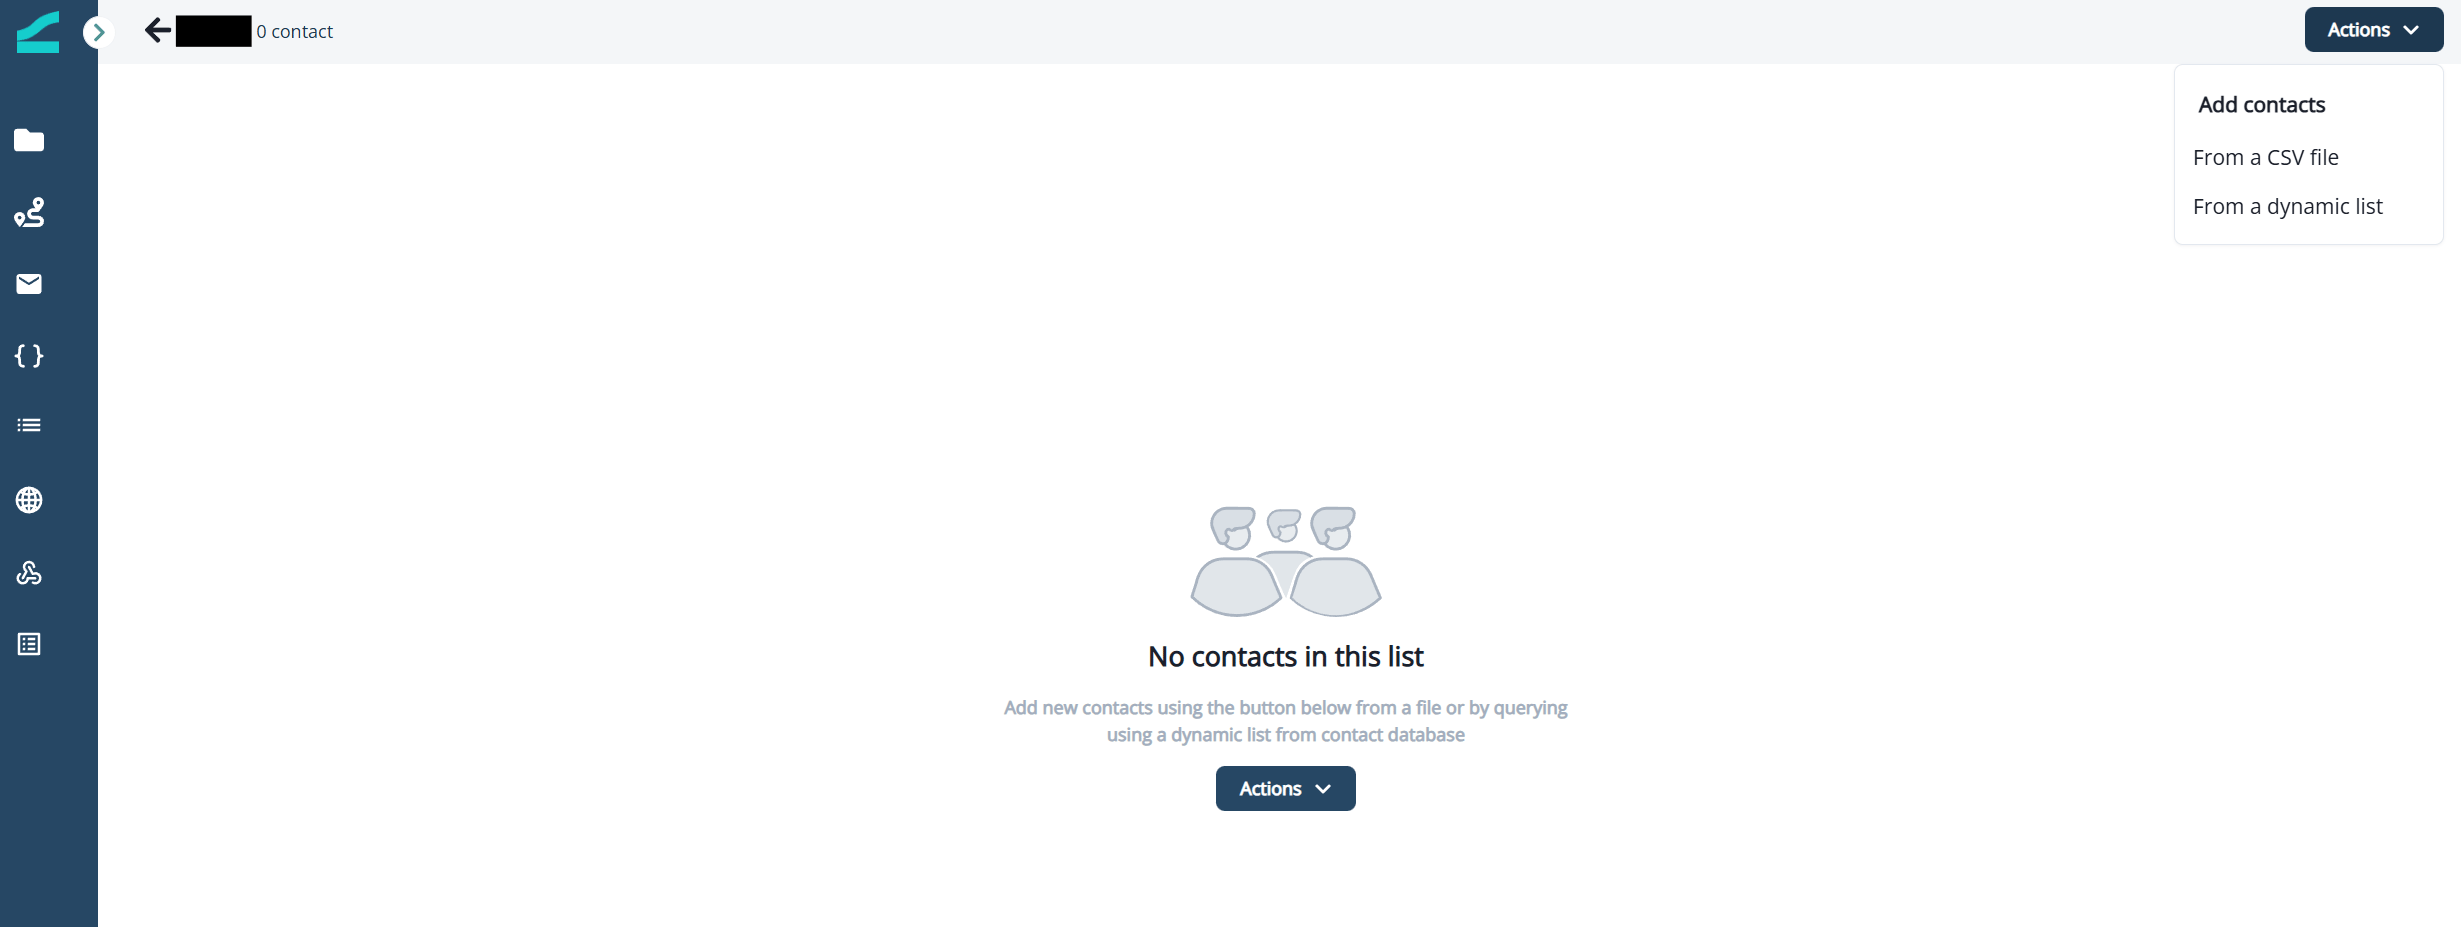
  2. Click New static list in the top right corner or select an existing static list. Select Actions > From a CSV file. Actions menu with From a CSV file option
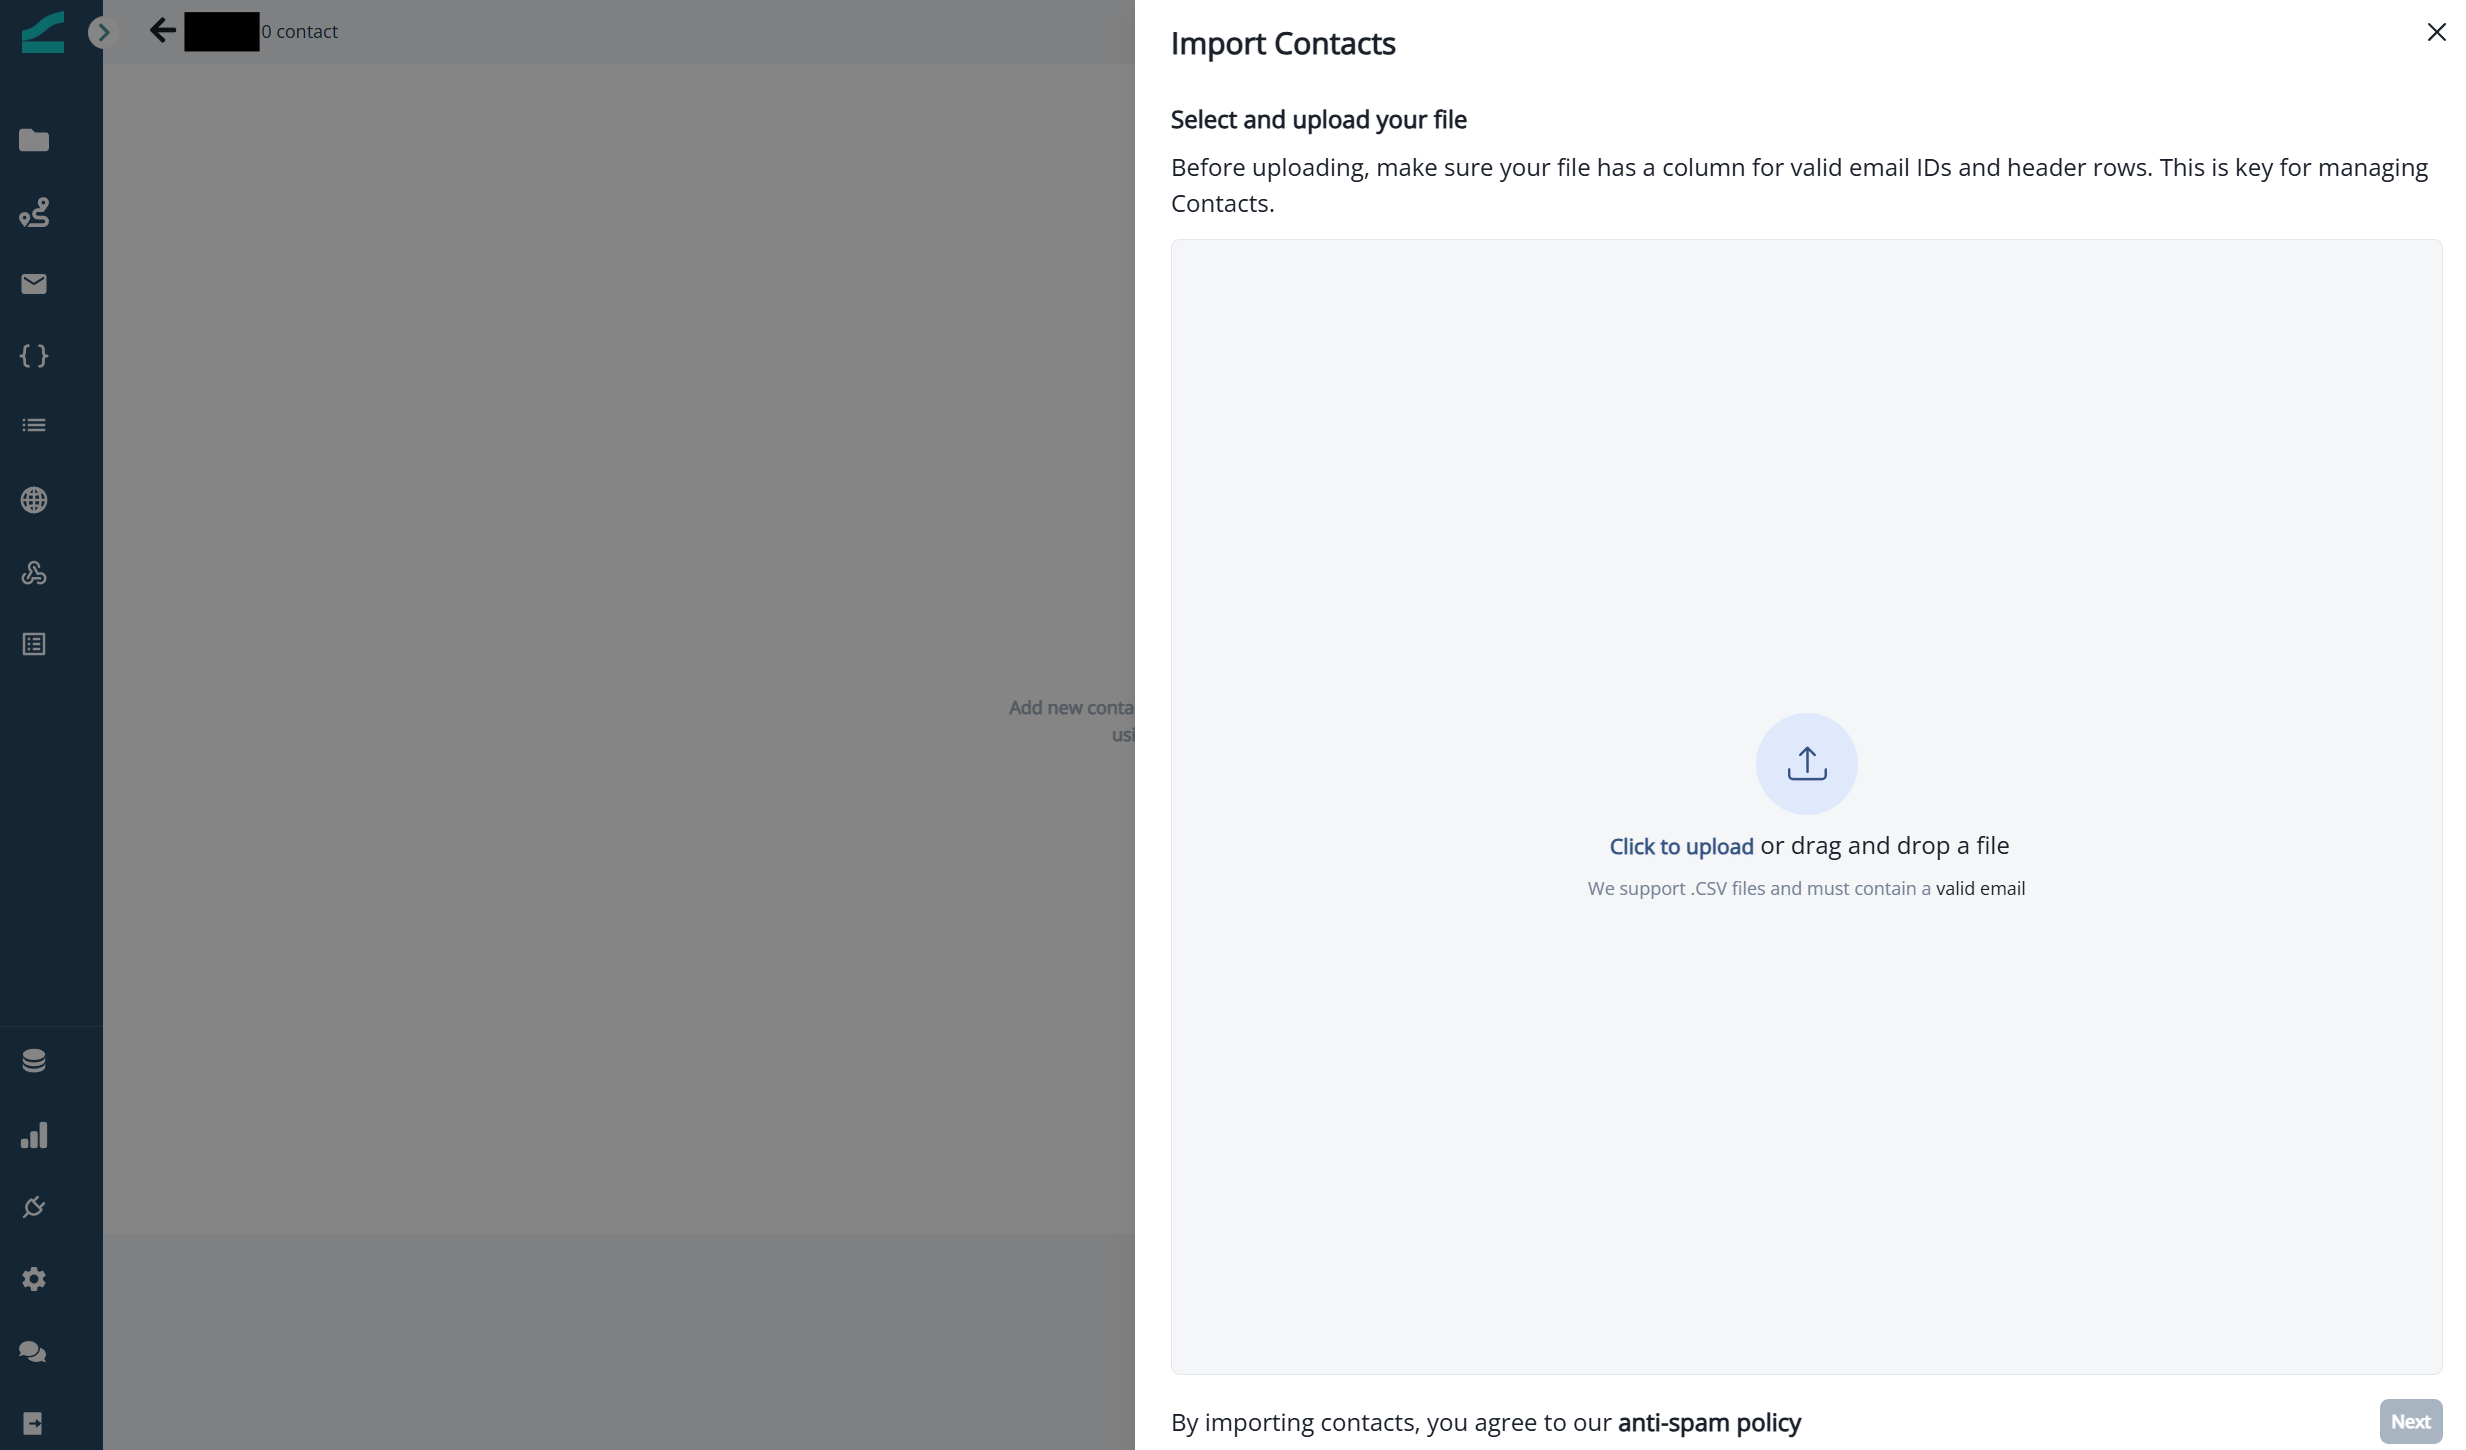
  3. In the modal that appears, browse or drag-and-drop the CSV file you wish to upload. CSV upload modal with drag-and-drop area
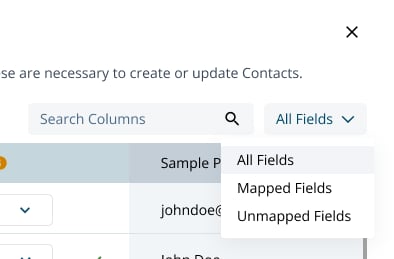
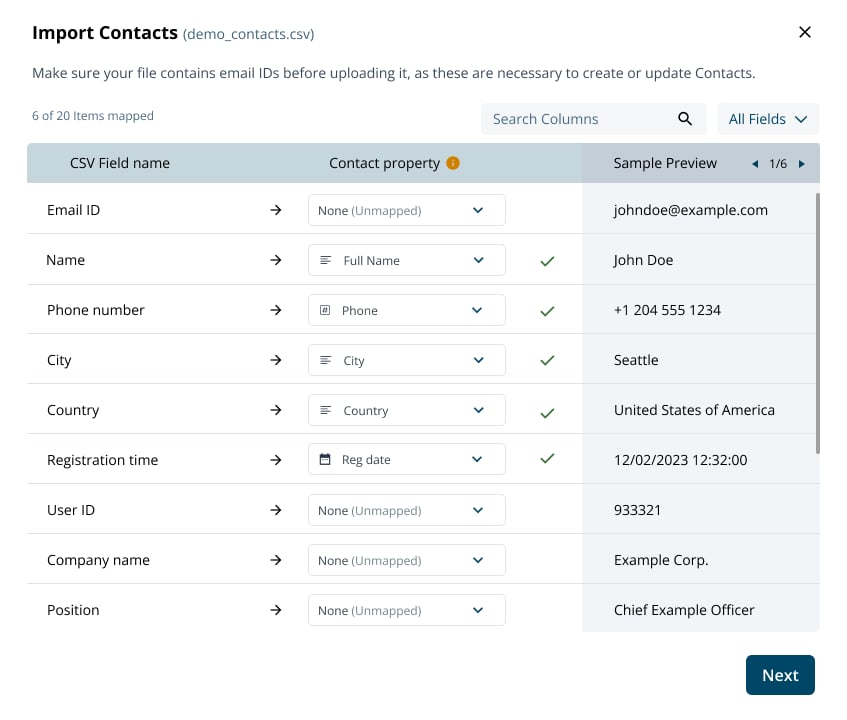
  4. Map your CSV columns to existing Contact fields in Inflection. Proceed with the suggested mapping or adjust the columns as needed. Column mapping screen for CSV import A checkmark appears next to each mapped column when the data matches the contact field data type. Preview the first few rows of your CSV file to verify your field content. Filter column names by searching or by selecting unmapped/mapped options. Filter columns by mapped or unmapped status
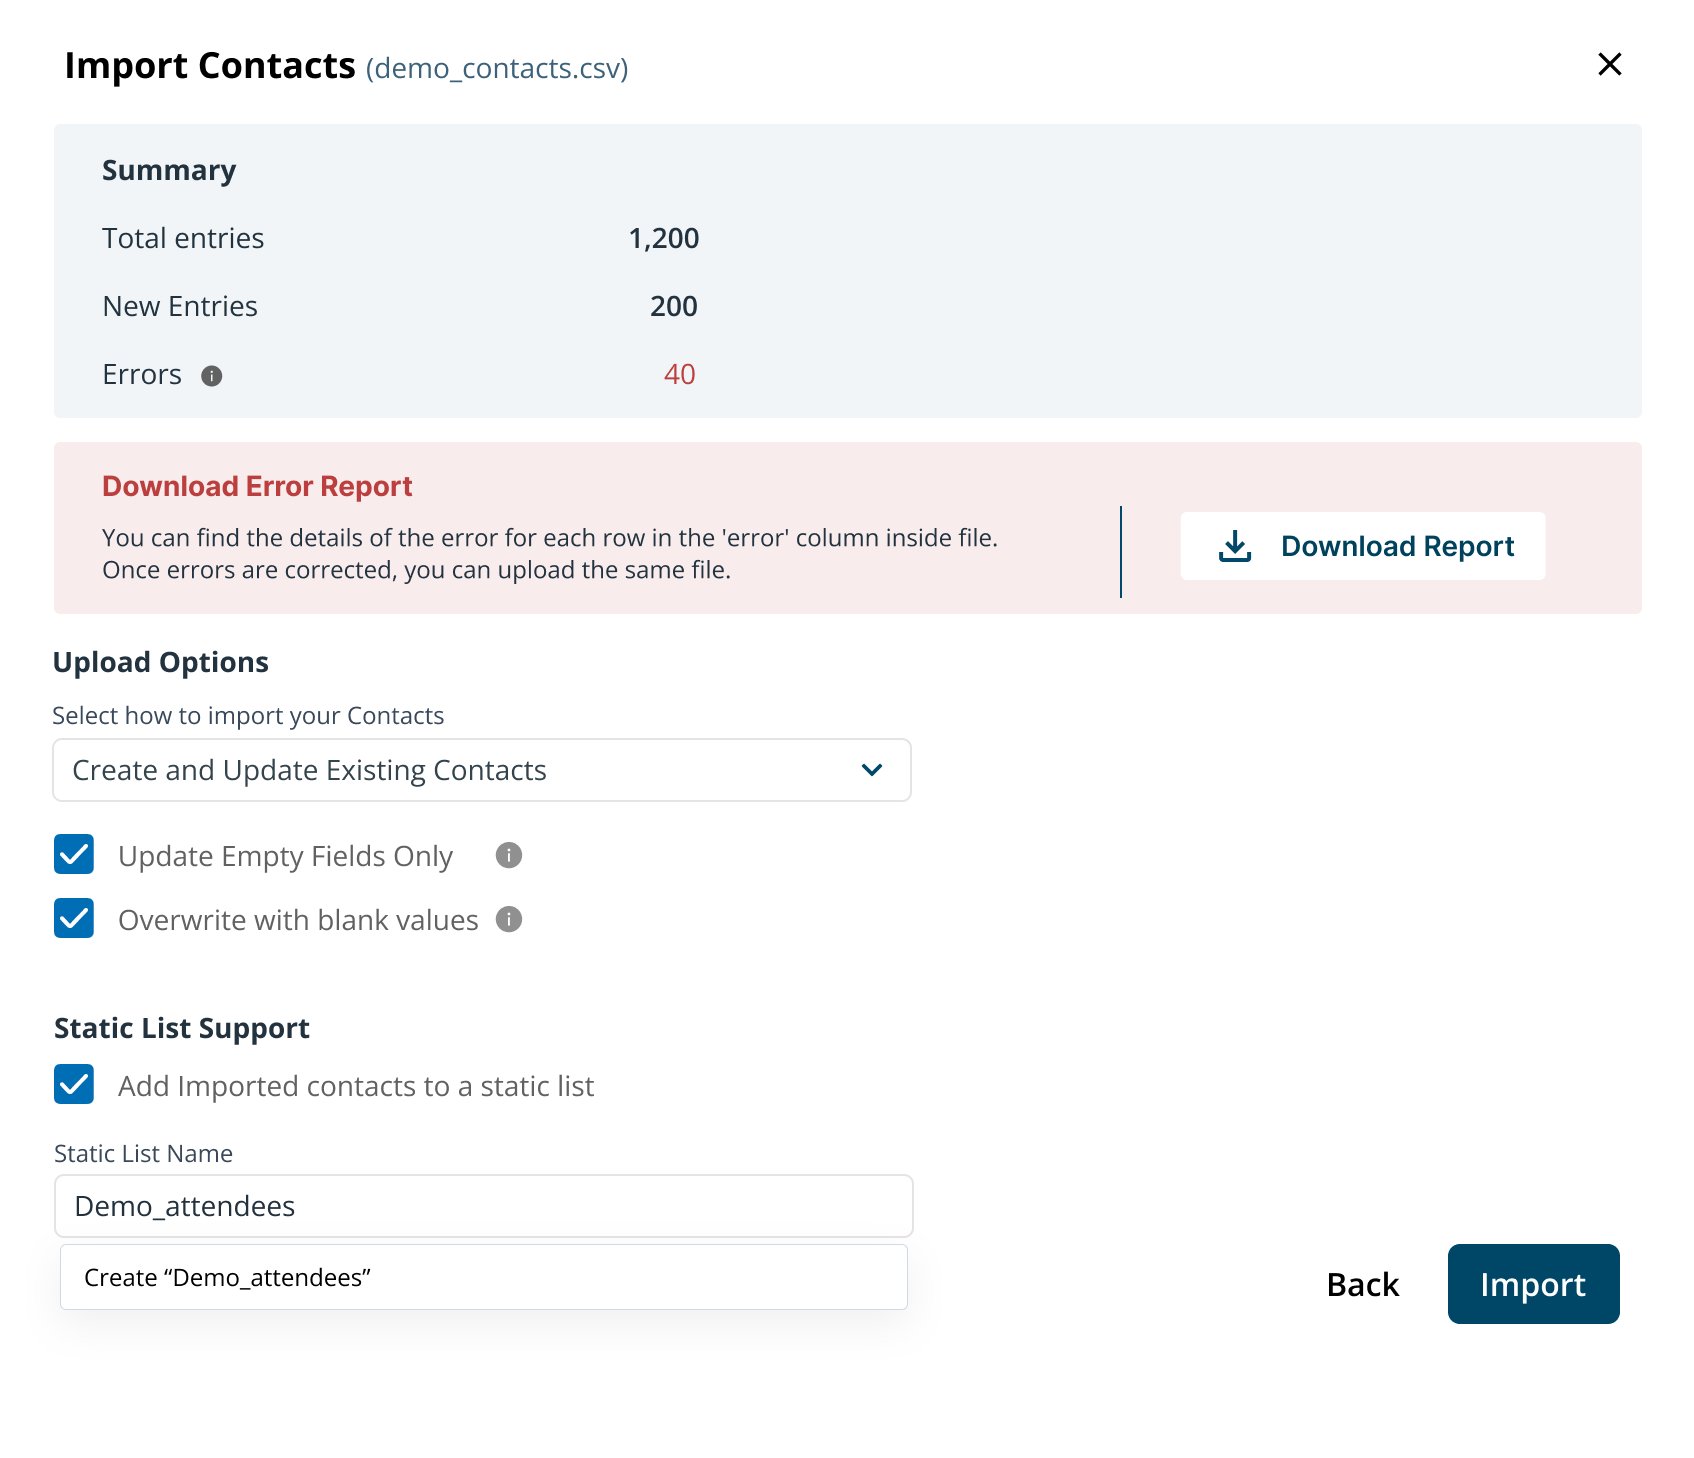
  5. Review the summary page showing total entries, new contacts, and errors in your file. Import summary page with entry counts and errors Download the error report for detailed insights into any errors in your CSV file. Adjust your import settings and choose to upload contacts to a new or existing static list. Click Import when satisfied with your configuration.
  6. Click Import Contacts on the final confirmation page to complete the import.

Import Options

Control how CSV data updates your contact database by selecting one of three import behaviors:
  • Only Create New Contacts: Creates new contacts from email IDs not found in your Contact database. Ignores existing email IDs.
  • Only Update Existing Contacts: Updates existing contacts with new data from your CSV. Only non-blank CSV cells update existing values.
  • Create and Update Existing Contacts: Combines both behaviors above. Updates existing email ID contacts with non-blank values and creates new contacts from new email IDs.
Override the default update behavior with these options:
  • Update Empty Fields Only: Update only empty contact fields during the import process, leaving populated fields unchanged.
  • Overwrite with Blank Values: Replace existing Inflection data with blank values from the CSV.
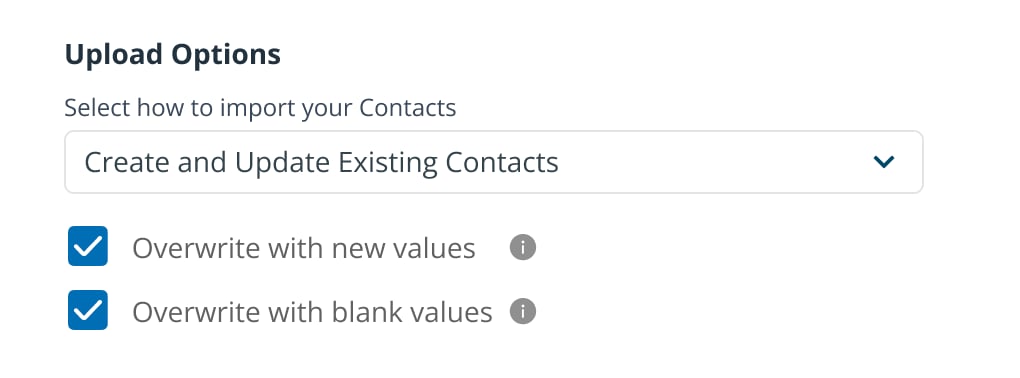
Warning: Enabling this option will result in the removal of existing contact properties if they are left blank in the CSV. Please exercise caution when enabling this option.
Import options for creating and updating contacts

Troubleshoot Upload Errors

Encoding Error

Upload UTF-8 encoded CSV files only. Ensure your file uses UTF-8 encoding before uploading.

Upload Failed

Retry the upload if it fails due to network or backend issues.

File Size Limit Exceeded

Split files larger than 500MB into smaller files and upload them separately.

Column Header Missing

Add headers to all columns in your CSV file before uploading.

Understand Error Reports

When Inflection processes your CSV file, invalid or error-prone fields are marked with error notes directly in the file. Download this error report to make corrections and re-upload your file.

Invalid Email

Invalid email addresses are flagged in the error report. Correct these addresses and re-upload the file.

Mismatched Data Types

Fields that do not match the expected Inflection property data type are flagged. Correct these fields according to Inflection data type requirements.

Duplicate Entries

Duplicate entries based on the email field are ignored and flagged in the error report.

Invalid Enumeration Option

Values that do not match existing options in a standard picklist or boolean field are flagged. Download the error report—a copy of your original CSV file with an added column specifying the error per row—make corrections, and re-upload the file.