

Unsubscribe Configuration
Default Settings
By default, an unsubscribe link is automatically included in the email header of each marketing email. Inflection’s standard unsubscribe link is included in every email’s header and resolves to Inflection’s default opt-out page. Best for fast setup and full per-email unsubscribe-rate reporting. When a contact clicks on the unsubscribe link, their unsubscribed contact field sets toTrue. Inflection will automatically exclude unsubscribed contacts from marketing sends.
“Unsubscribed” is a unique contact property that can only have Two Way as its Salesforce Sync Preference. This ensures that the latest subscription status is synchronized across all data connections.
Custom Opt-out Confirmation Page
Optionally, send contacts to a branded confirmation page after they unsubscribe. An email opt-out confirmation page is a webpage displayed to users after they unsubscribe from emails, allowing companies to personalize the opt-out experience for their audience. It offers many advantages for the brands, including:- Branding: Reinforces brand identity, even during opt-out.
- Audience feedback: Collects reasons for unsubscribing to improve content.
- Retention opportunity: Offers options to adjust preferences instead of full opt-out, potentially retaining subscribers.
Steps to Configure
-
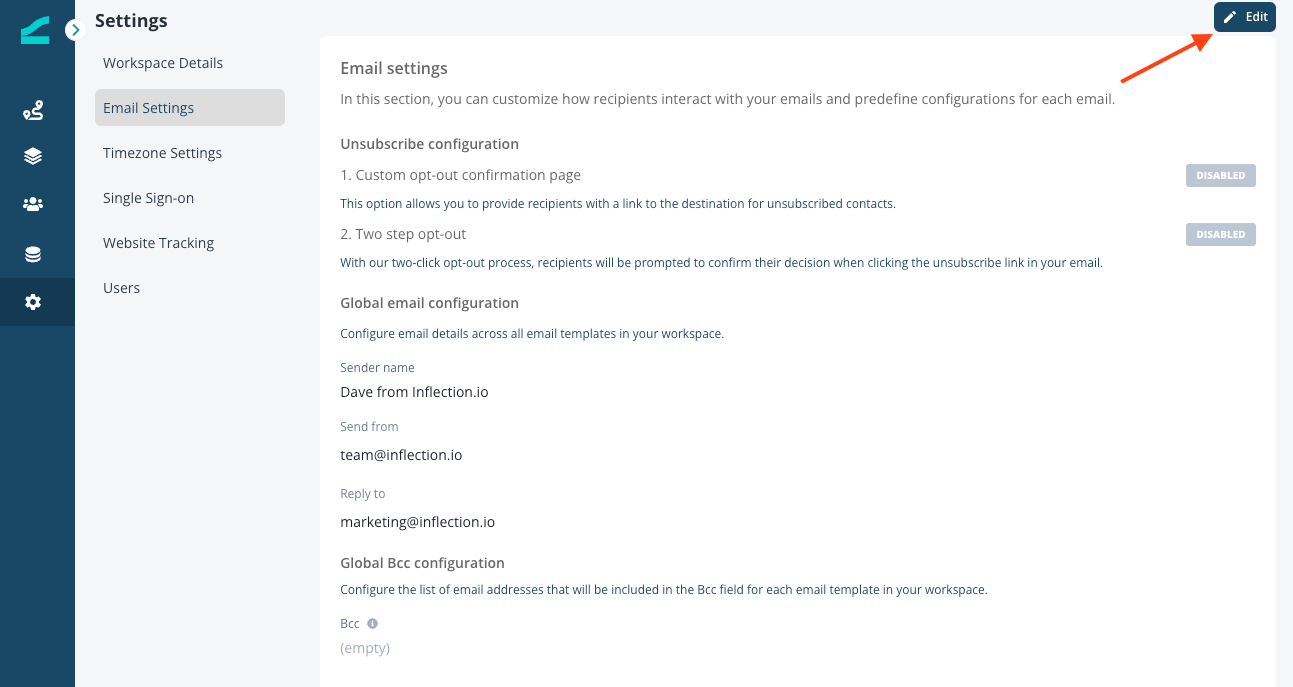
In Settings, navigate to Email Settings and click the Edit button.
-
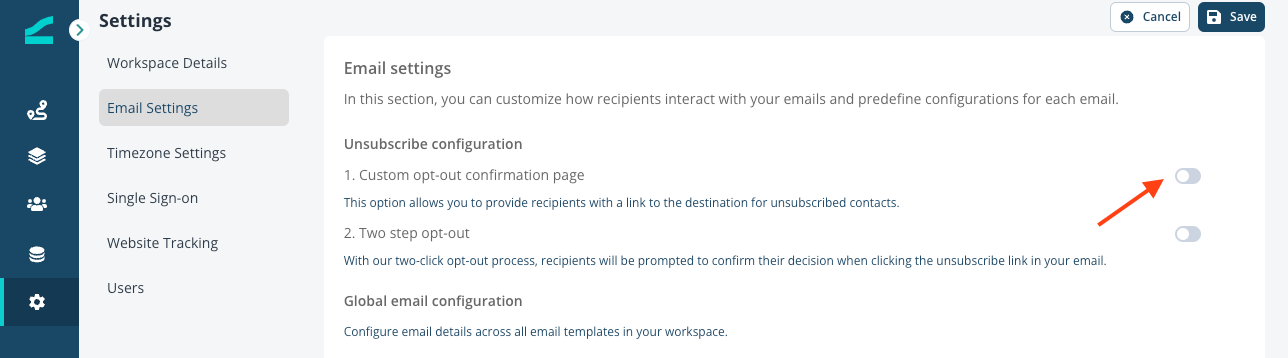
You will see the option to turn on the opt-out confirmation page option. Use the toggle to turn it on.
-
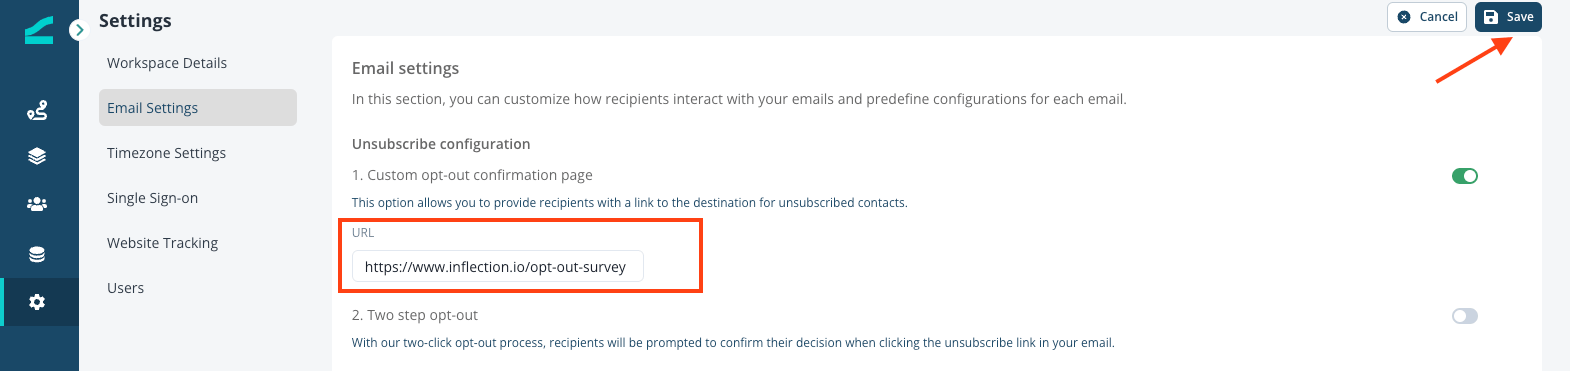
Paste the URL of the custom opt-out confirmation page in the field and click Save.
Two-Step Opt Out
The two-step unsubscribe process adds an additional layer of confirmation. It confirms customer intent to unsubscribe, preventing accidental opt-outs. This process improves user experience and also protects against automated bots that could trigger unintended unsubscribe actions, preserving the integrity of your subscriber list. To enable it, go to Settings > Email Settings > Two-step opt out and toggle the switch.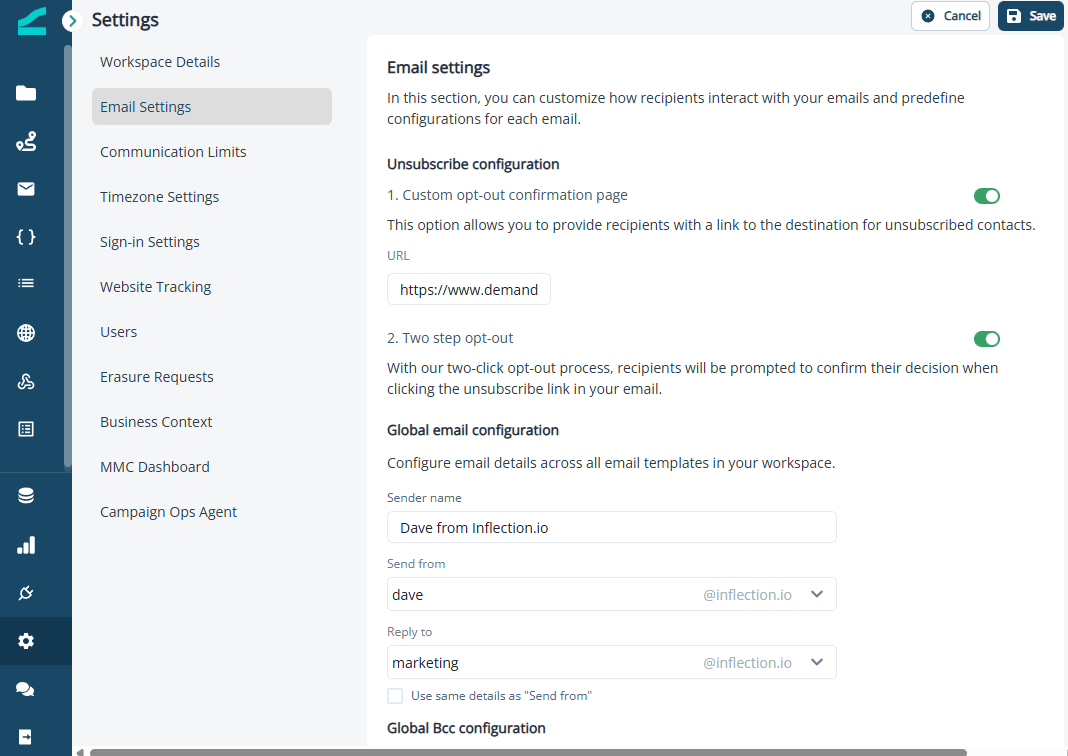
Gmail may only display the unsubscribe link in the header after completing its internal trust check process.
Communications Limits
Communication limits can be used to prevent crowding end-user inboxes with multiple emails coming from different journeys. This can reduce marketing fatigue and unsubscribes.Configure Global Communications Limits
-
Go to Settings > Communication Limits. Click on “Edit” at the top right corner. Set the Toggle to active next to the “Global Communication Limits”
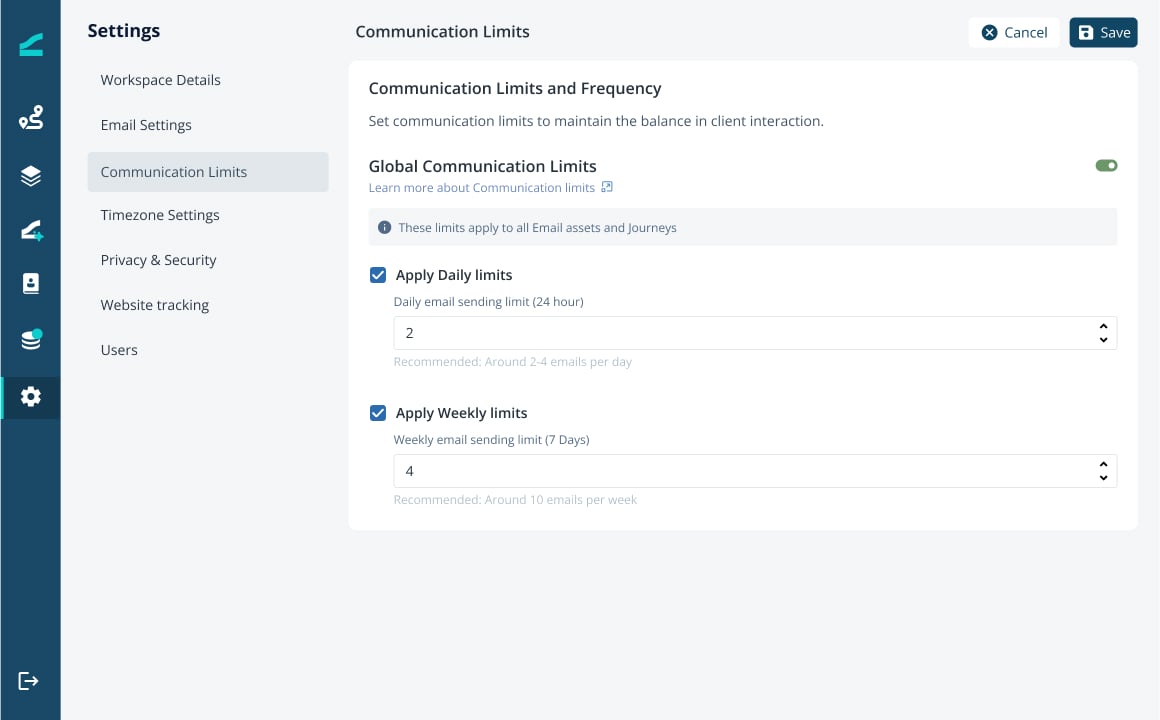
- Choose which kind of limits you want to set. You can set Daily Limits, Weekly Limits or both.
- Click save. Communication limits are now enabled. Customers will not receive emails if they exceed Daily OR Weekly limits.
Limits are applied on a rolling window from the time of sending.For example, if an email is sent at 9:00 AM on Monday, 17th Feb:
- Emails sent between 9:00 AM Sunday, 16 Feb → 9:00 AM Monday, 17 Feb are considered for daily limits
- Emails sent between 9:00 AM Monday, 10 Feb → 9:00 AM Monday, 17 Feb are considered for Weekly Limits
Override Communication Limits
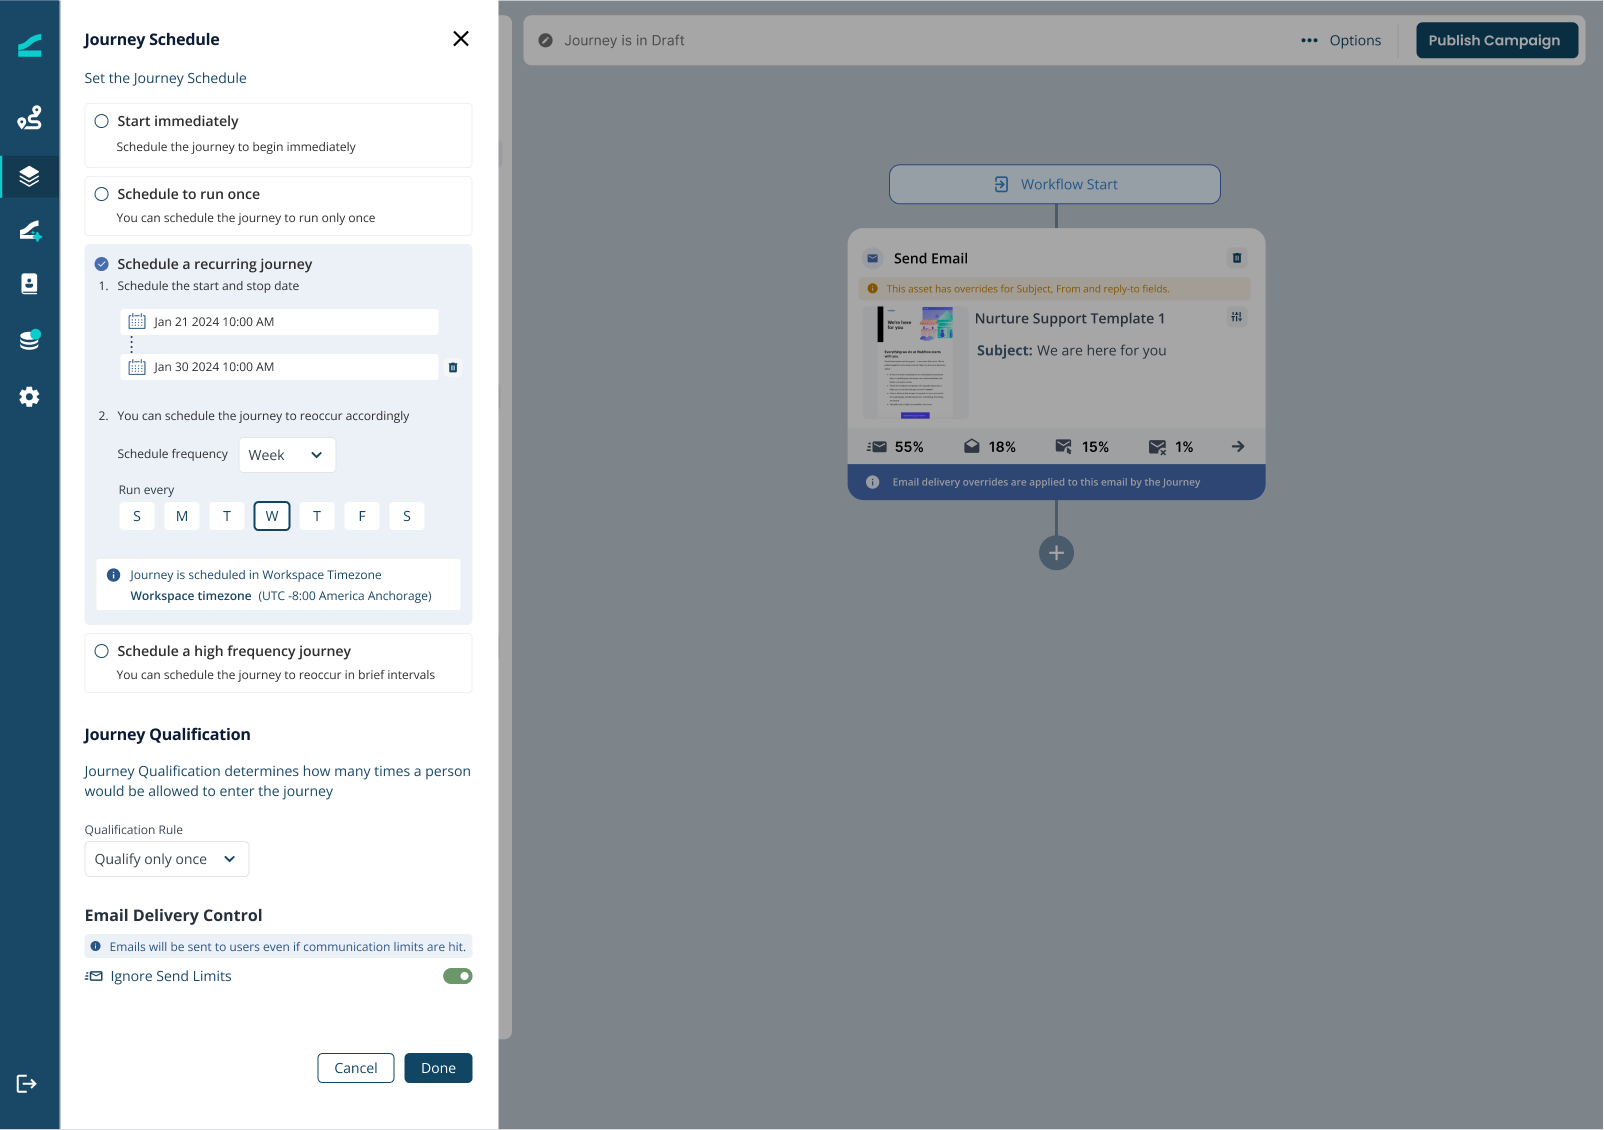
You can override communication limits at 3 levels.- When Ignore Send Limit is enabled on a Journey, all emails within the journey will be sent to users, even if they exceed the daily or weekly limits
- When Ignore Send Limit is enabled on an Email Asset, all flowsteps using that email Asset across different journeys will get sent to users, even if they exceed the daily or weekly limits
- When Ignore Send Limit is enabled on a Flowstep, the email will get sent to users, even if they exceed the daily or weekly limits
Journeys
- Open the Journey
- In the left panel, go to Journey Settings
- In the Email Delivery Control section, set the toggle to active next to Ignore Send Limits
Email Asset
- Go to Assets → Email. Open the Asset.
- Visual Editor Emails
-
Click on the Email Settings on the top right
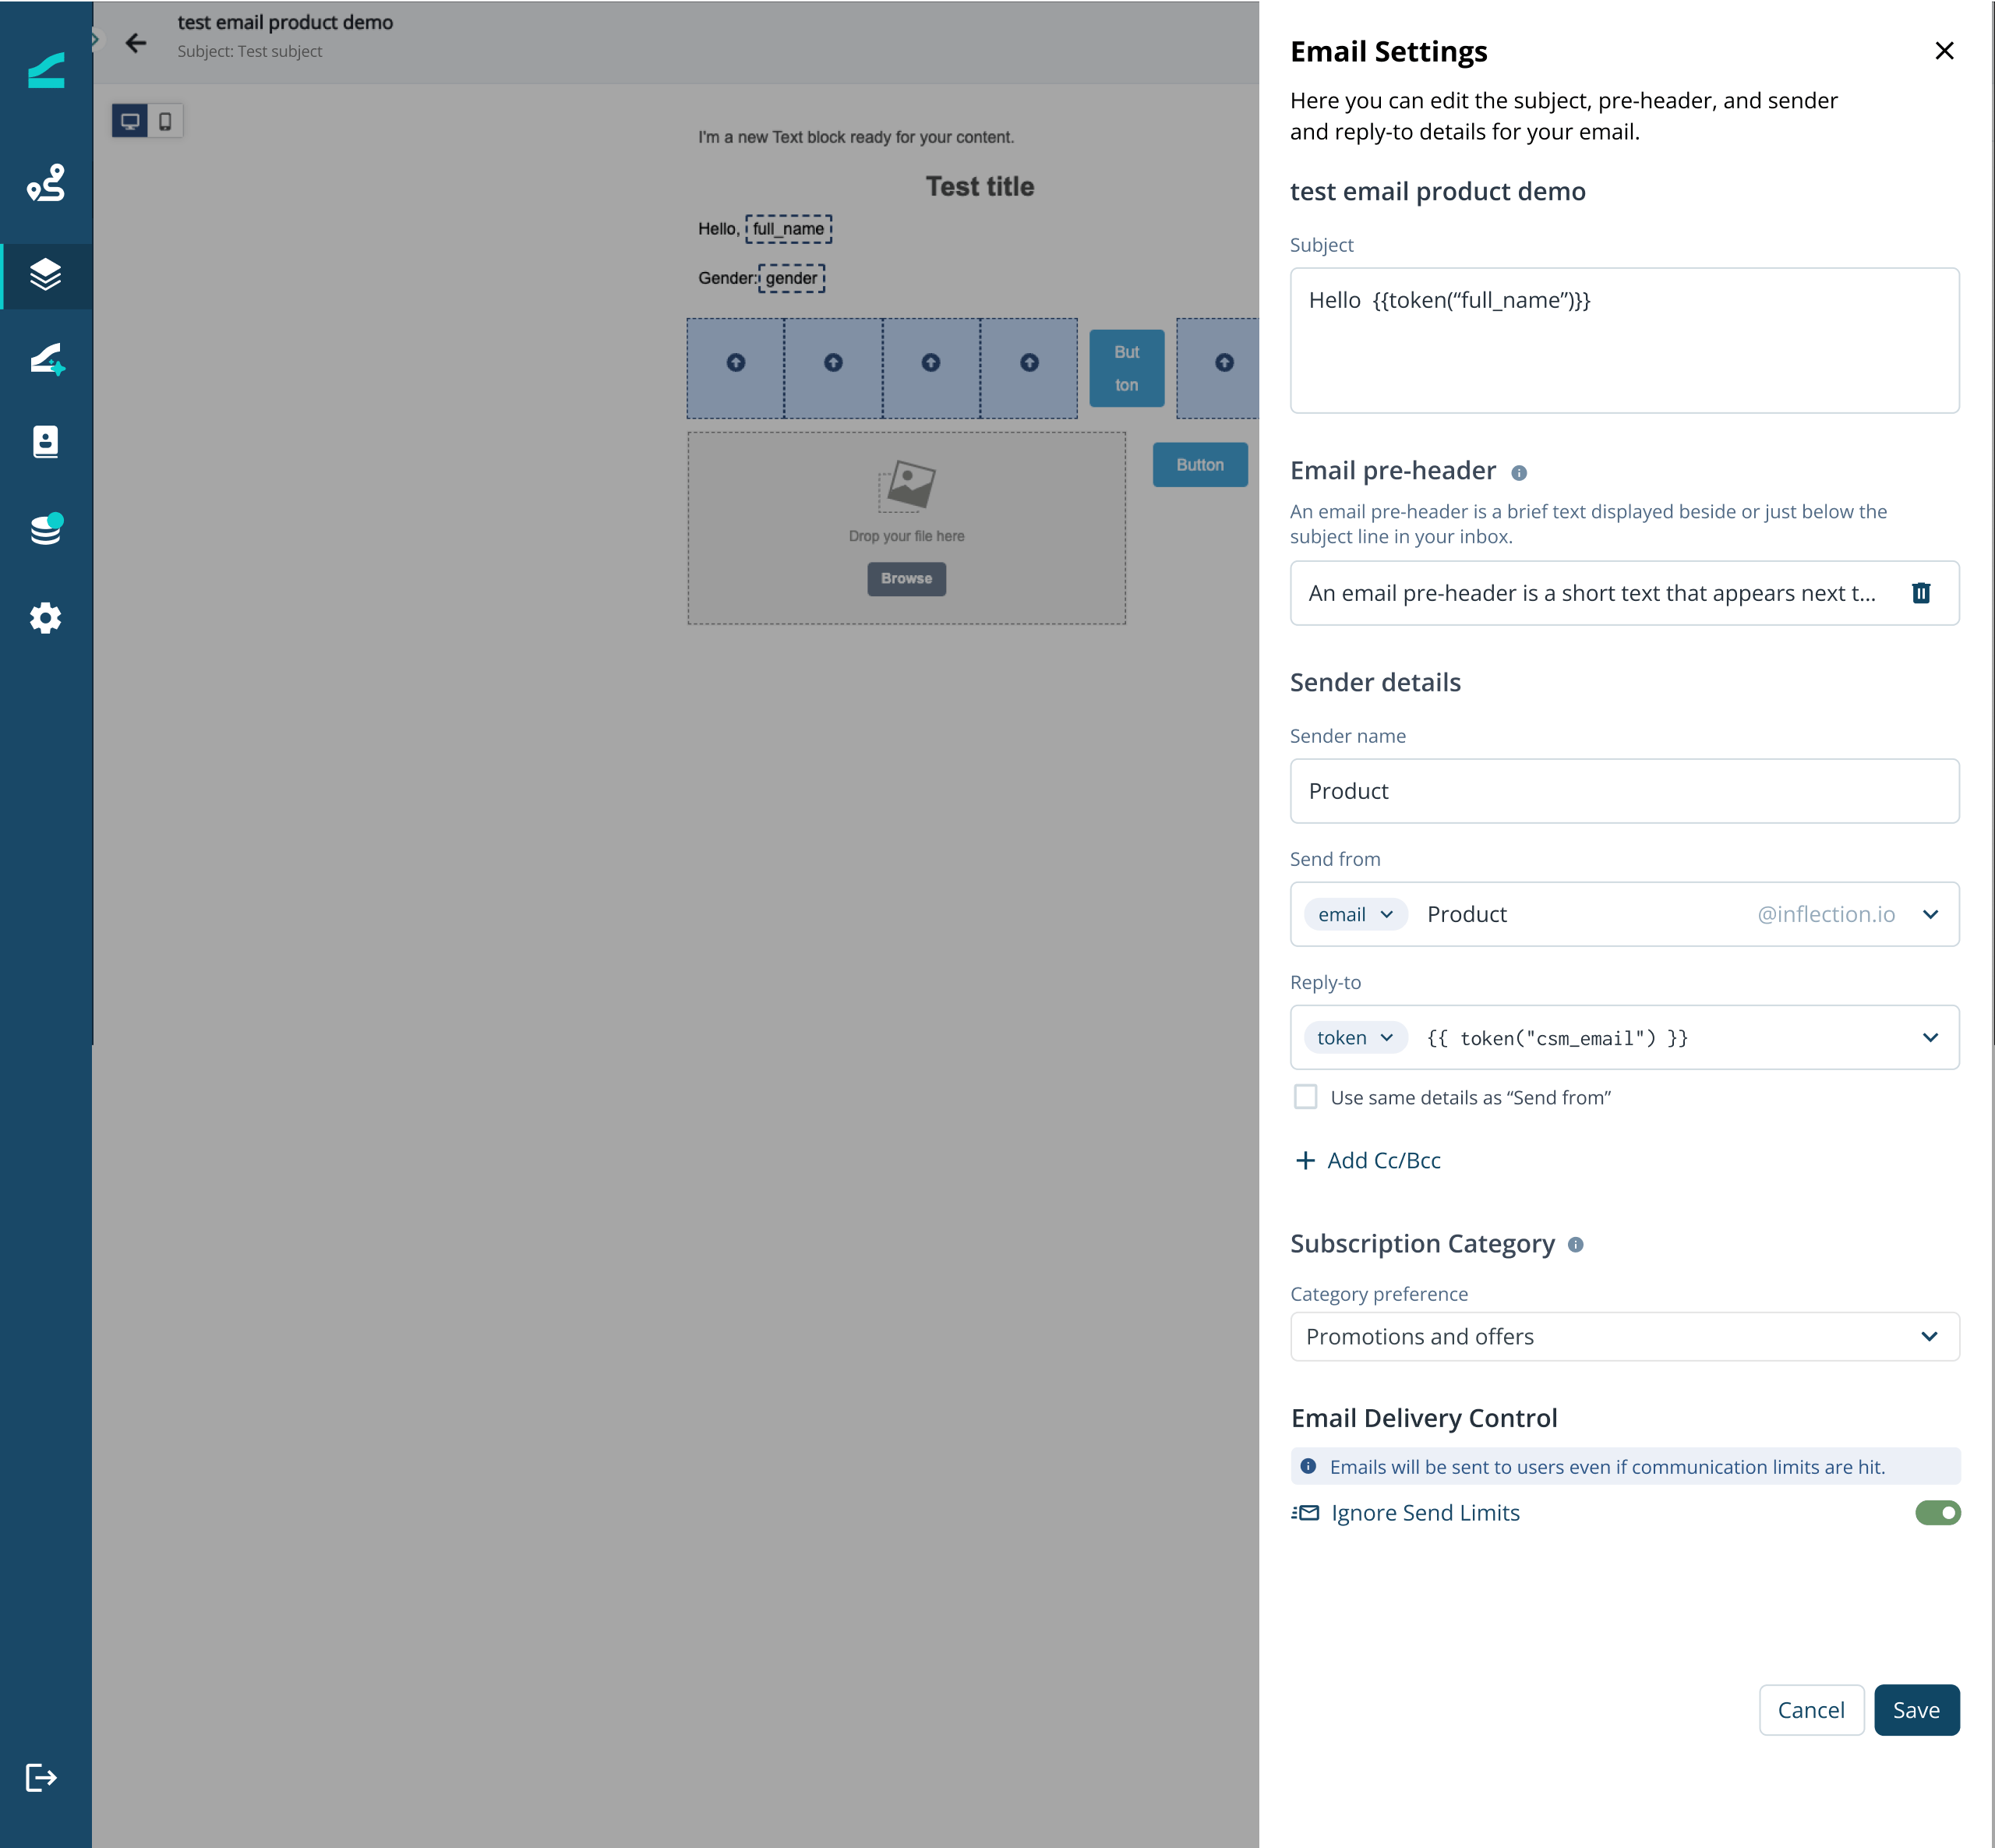
- In the Settings panel, navigate to “Email Delivery Control” section at the bottom
- Set the toggle to active, next to “Ignore Send Limits”
-
Click on the Email Settings on the top right
- Advanced Editor Emails
-
On the Left panel, go to “Email Delivery Control” section at the bottom
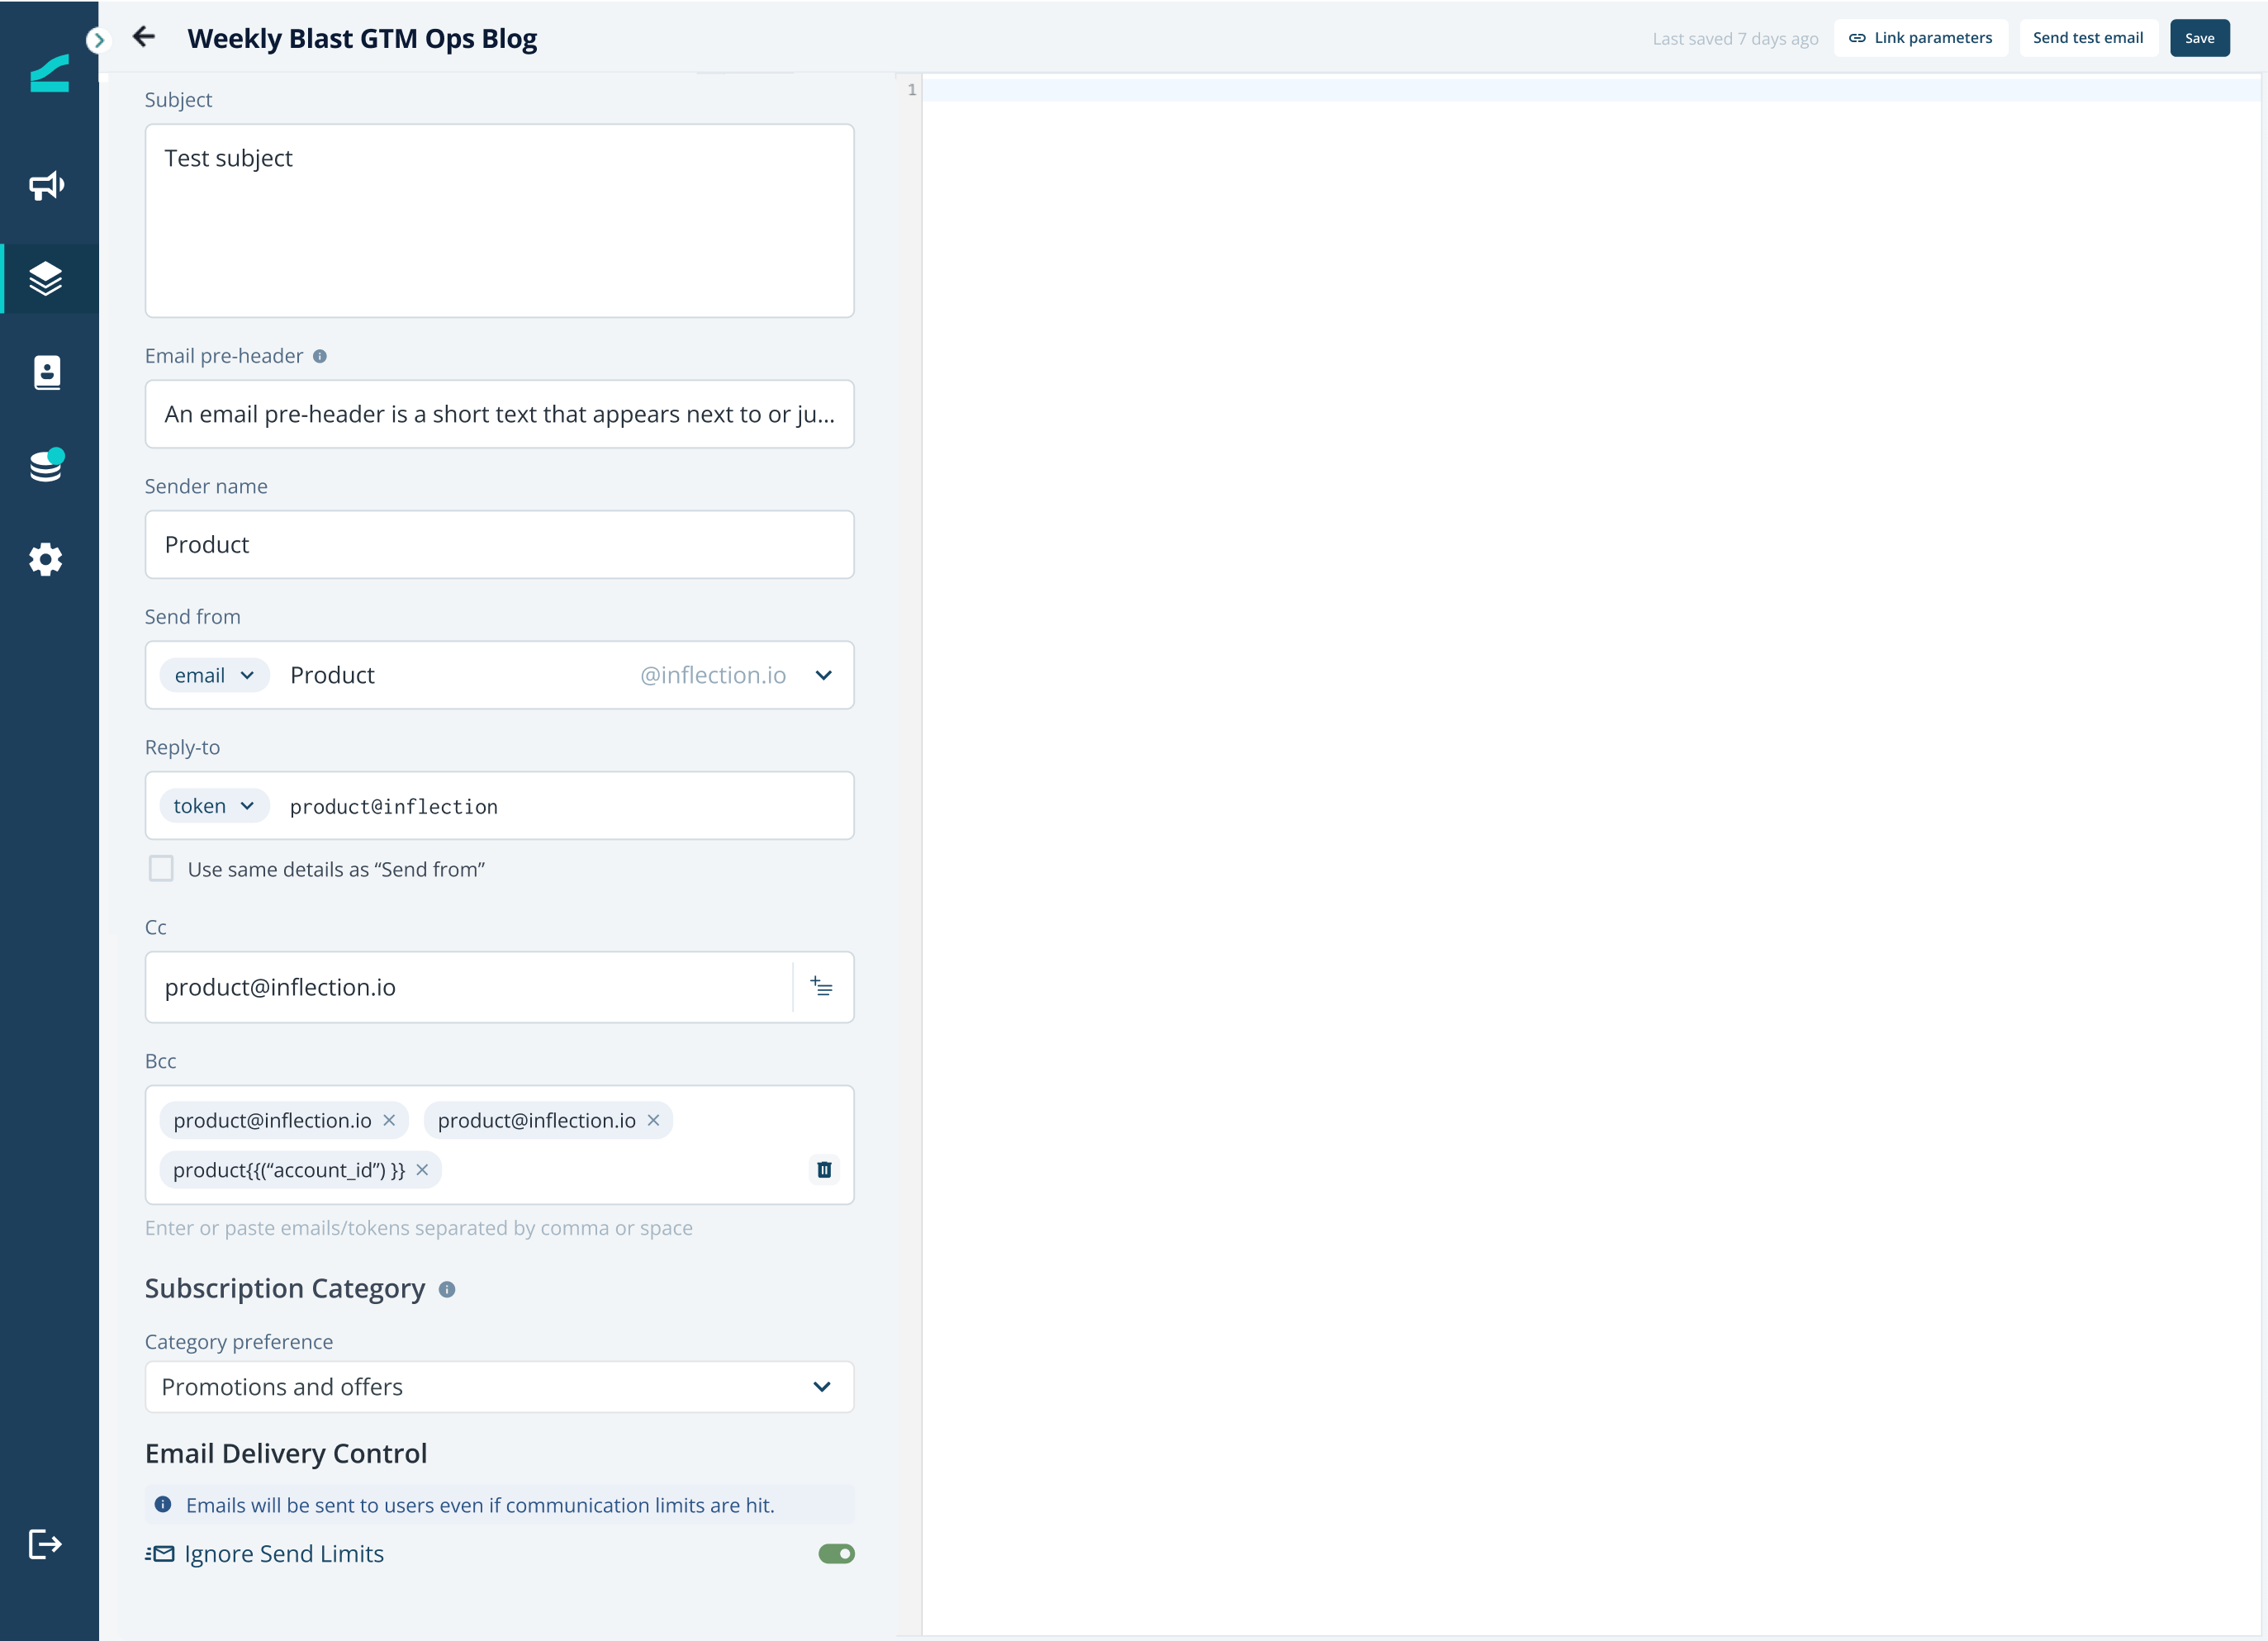
- Set the toggle to active next to “Ignore Send Limits”
-
On the Left panel, go to “Email Delivery Control” section at the bottom
- Visual Editor Emails
Email Flowstep
- Open the Journey.
-
Click on the Email Flowstep. Click on the Pencil Icon to open the Email Preview
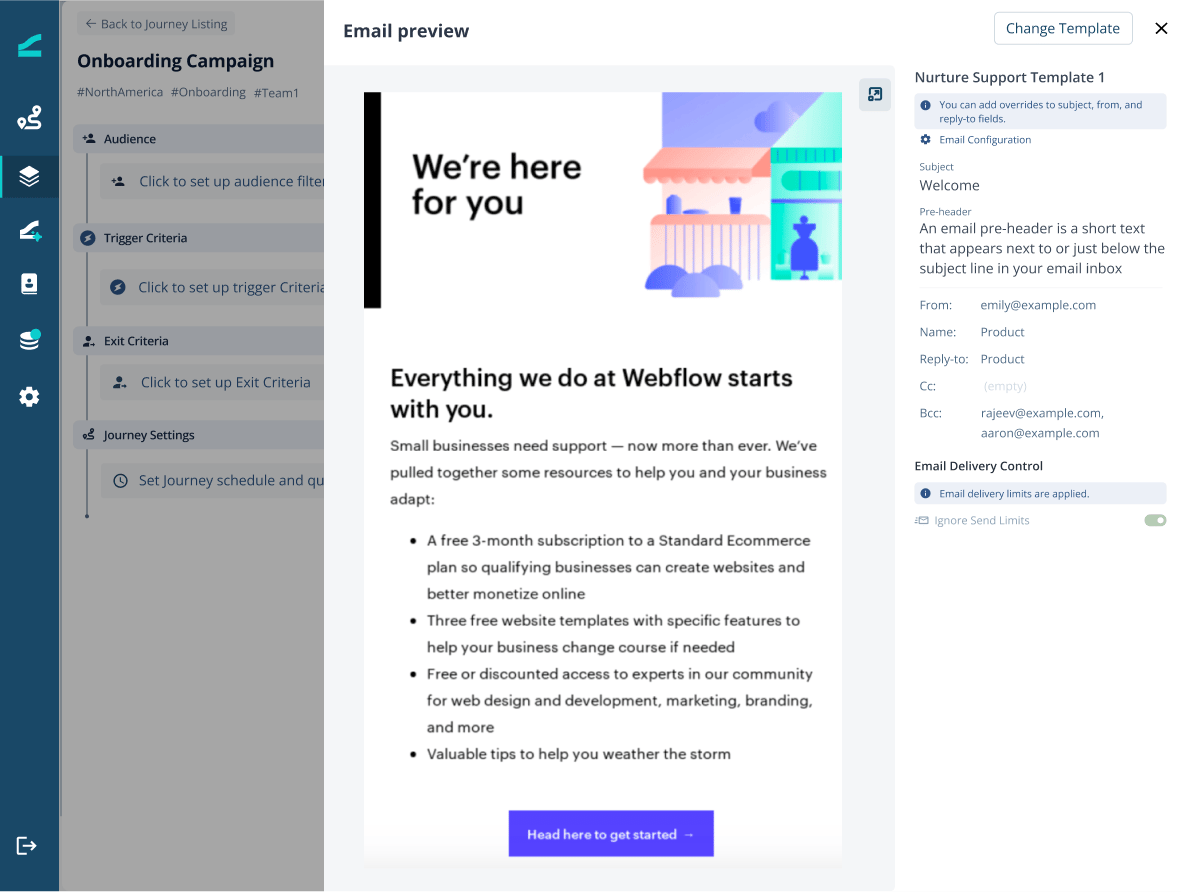
- In the Email Preview, navigate to “Email Delivery Control” section on the right bottom side
- Set the toggle to active next to “Ignore Send Limits”