

Creating a Inbound Webhook connection for Goldcast
Creating a Inbound Webhook connection for Goldcast
- You can create a new Inbound Webhook under:
-
Assets → Inbound Webhook
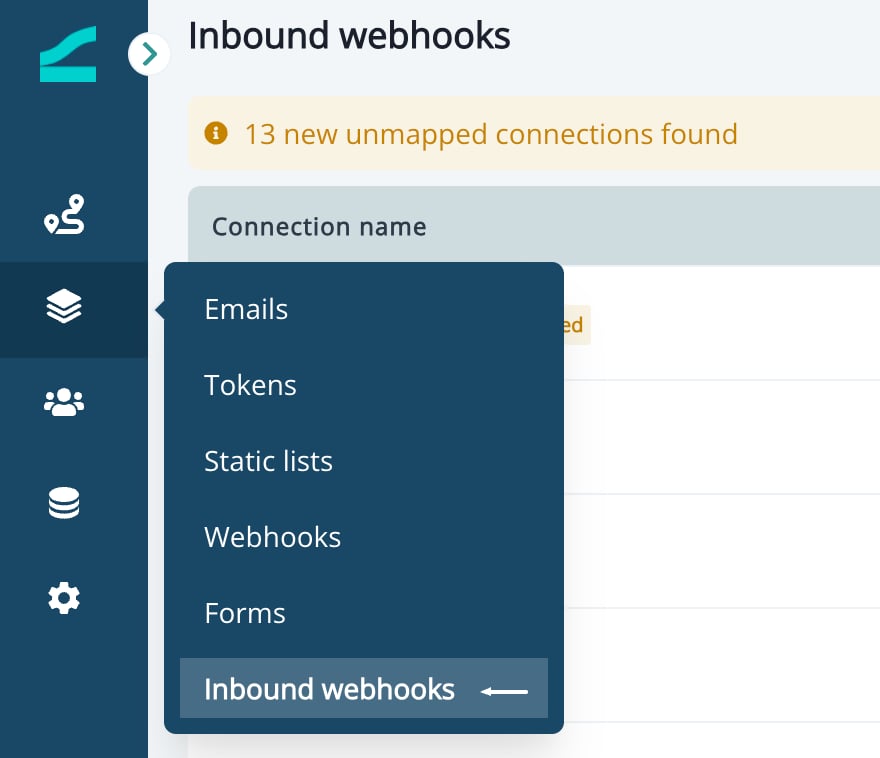
- Click “New Connection”
-
Provide a connection name and an optional description
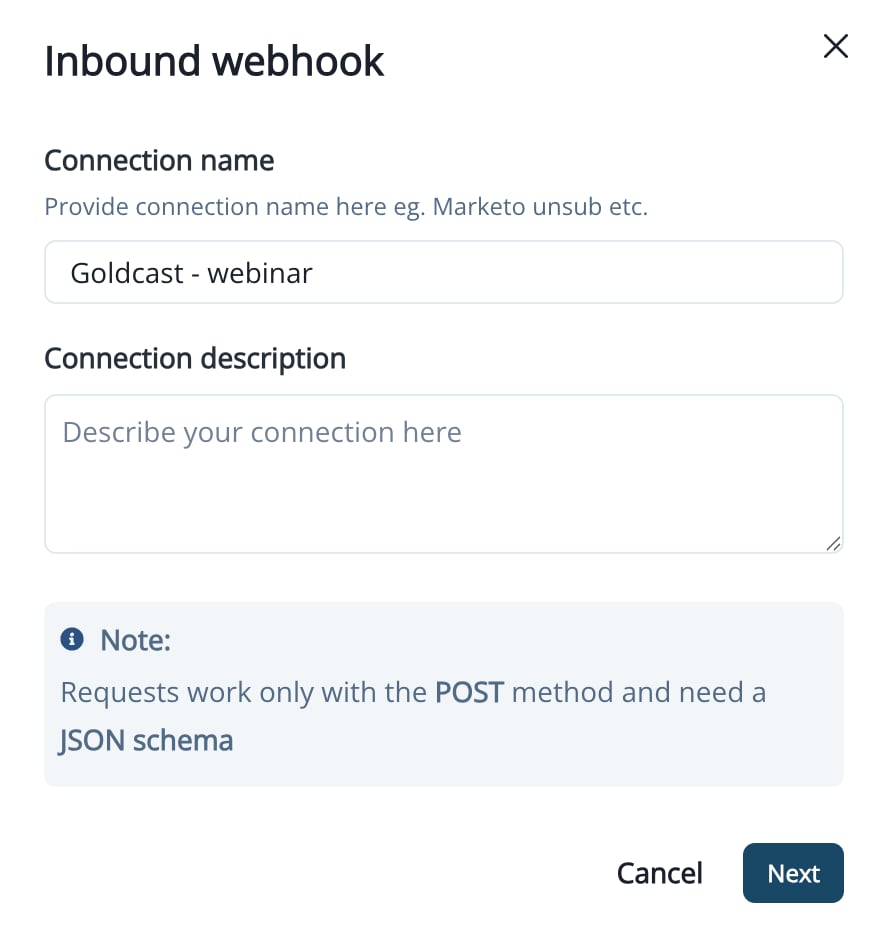
- Select an Authentication Method: No Auth / Basic Auth / API Key.
-
Enable or disable “Create New Contact”:
- ✅ If enabled, Inflection will create a new contact whenever a new email ID is received
- ❌ If disabled, no new contacts will be created
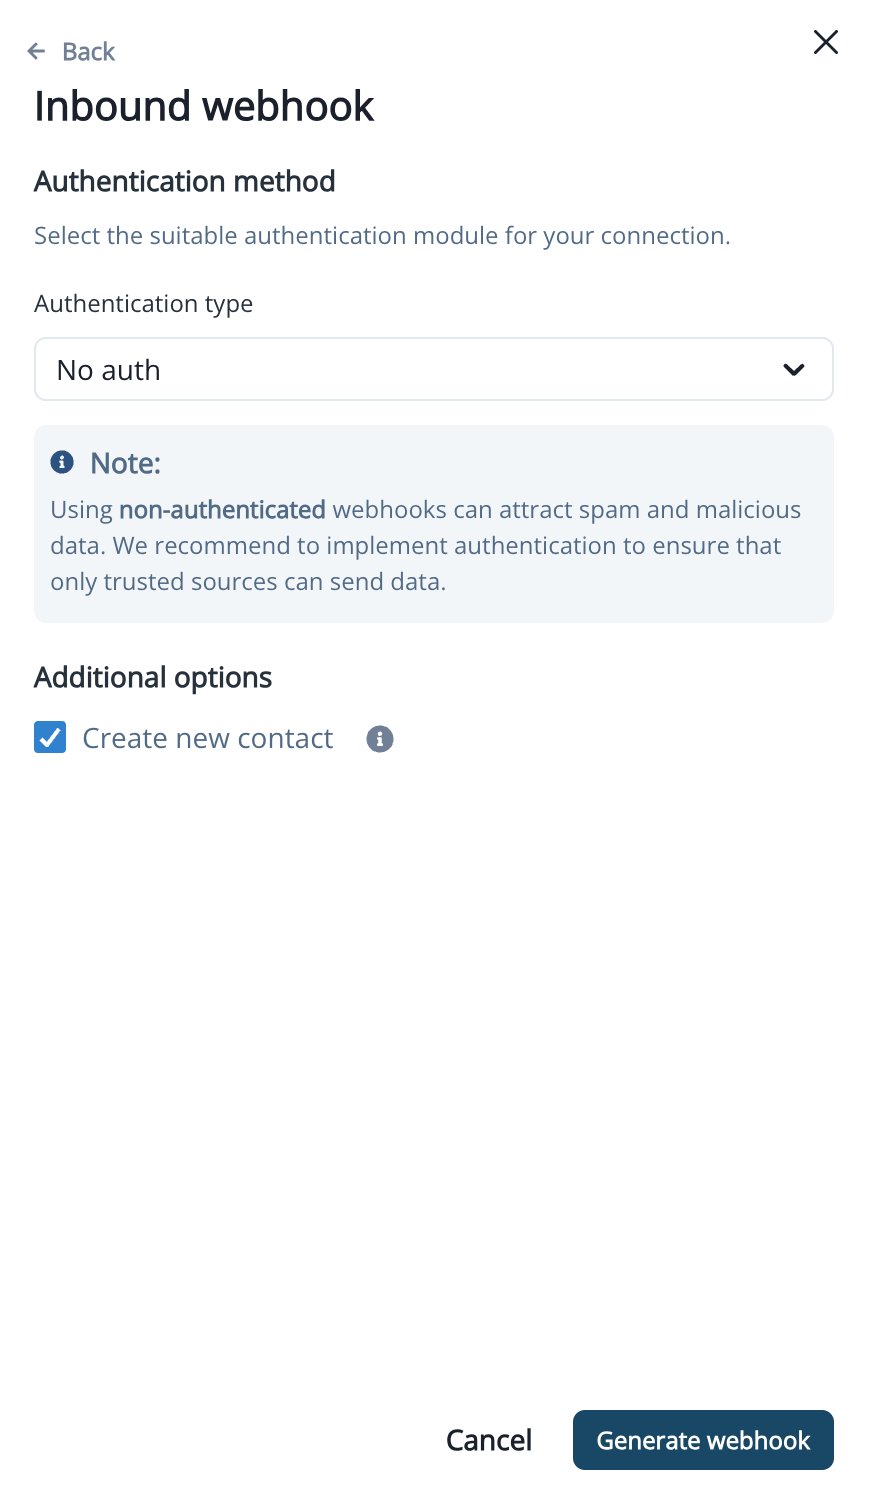
- Click “Generate webhook” to create connection
-
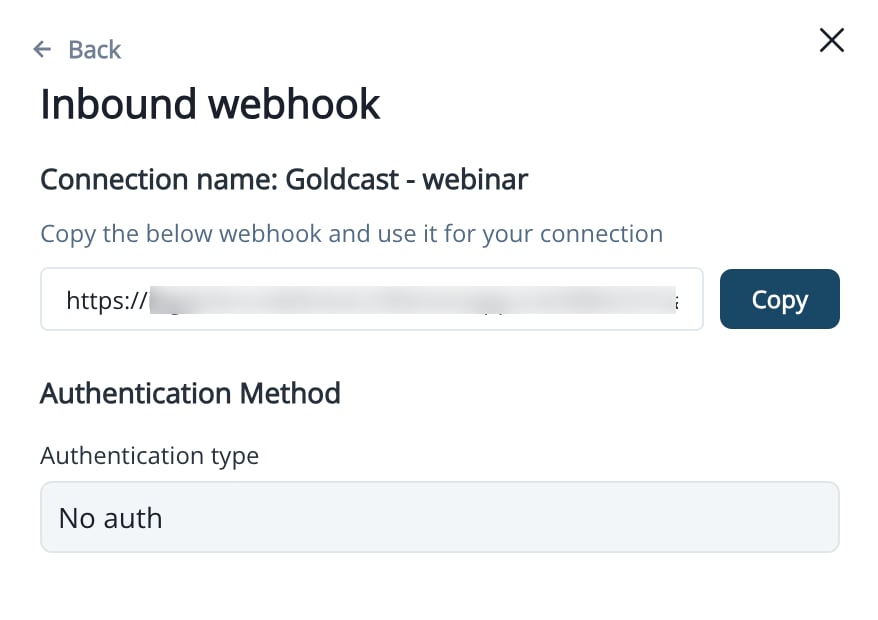
Copy and configure the webhook URL and authentication details (if applicable) in Goldcast
Connecting Goldcast events to Inflection
Connecting Goldcast events to Inflection
Step 1: Installing the Webhooks App
-
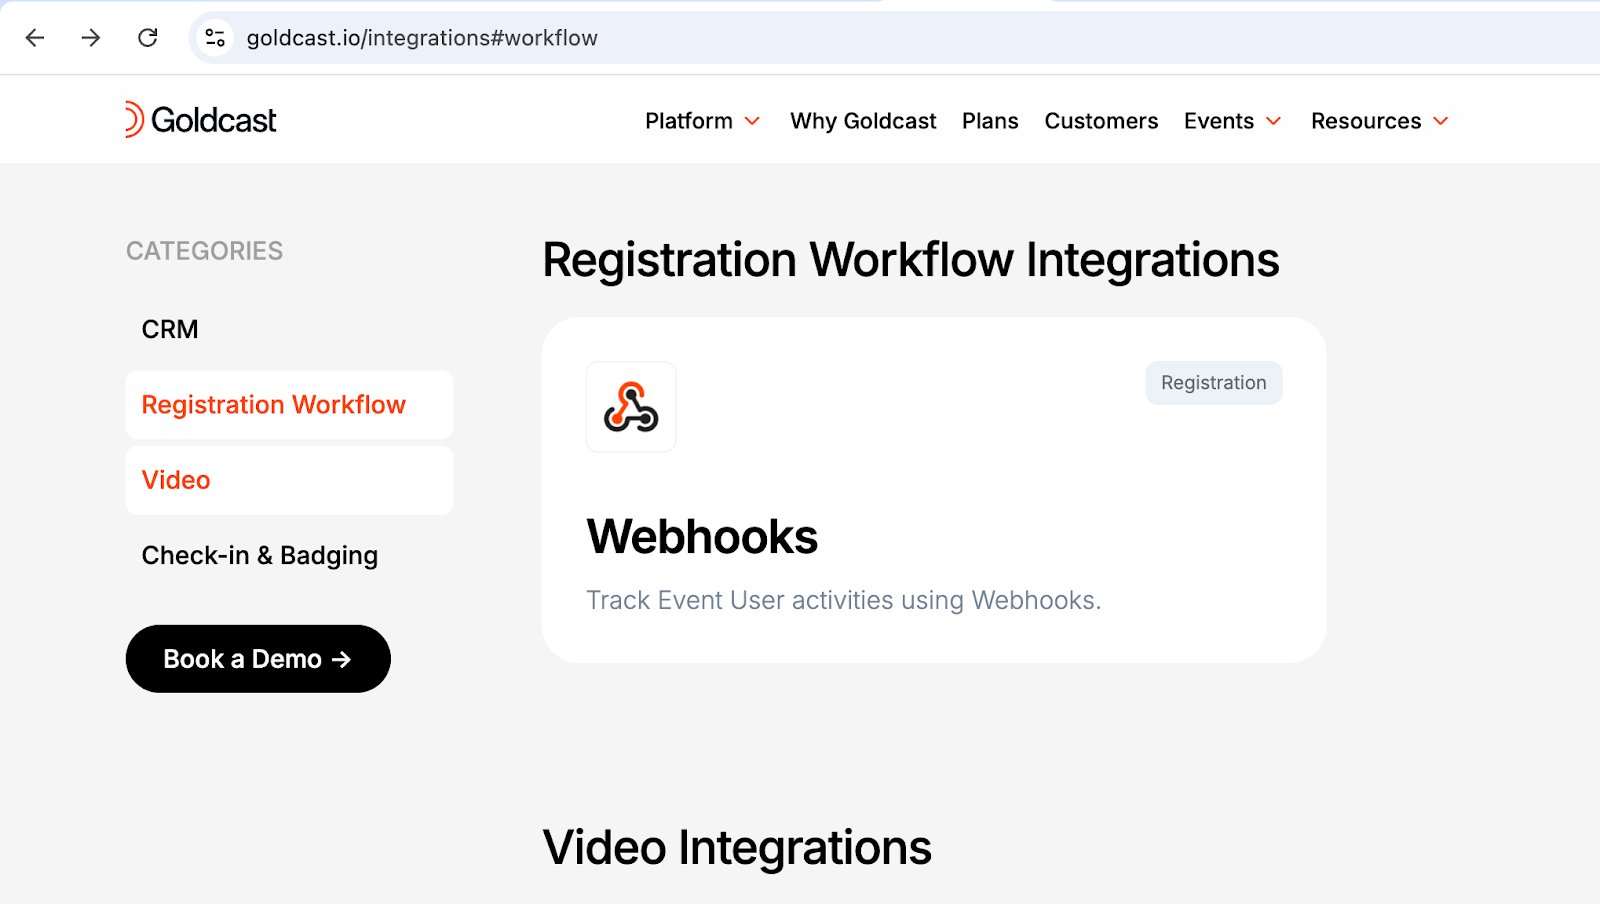
Access the Marketplace:
- Go to the Goldcast Marketplace and locate the Webhooks tile.
-
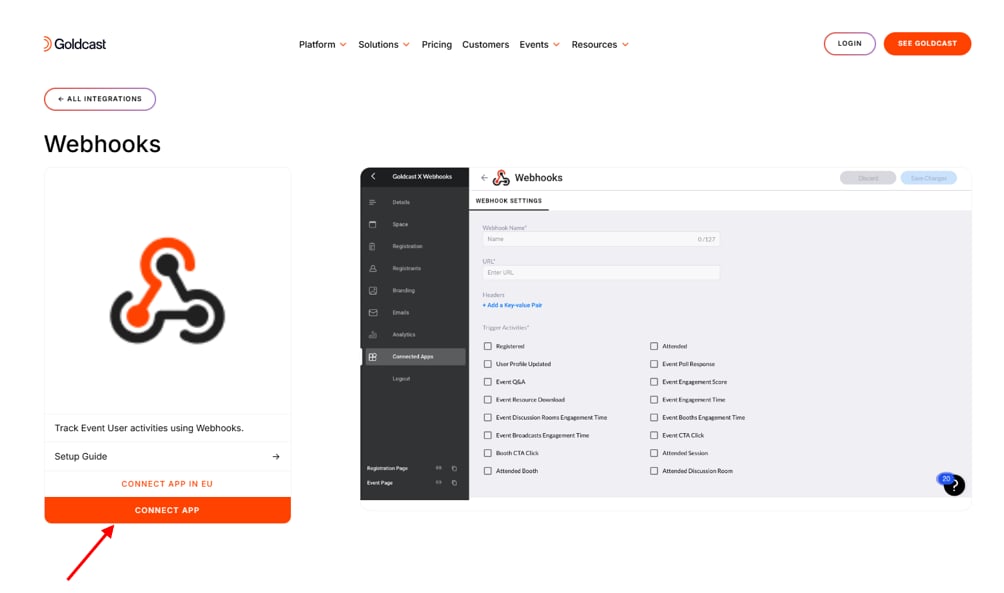
Initiate the Connection:
- Click the Connect App button to start the installation process.
-
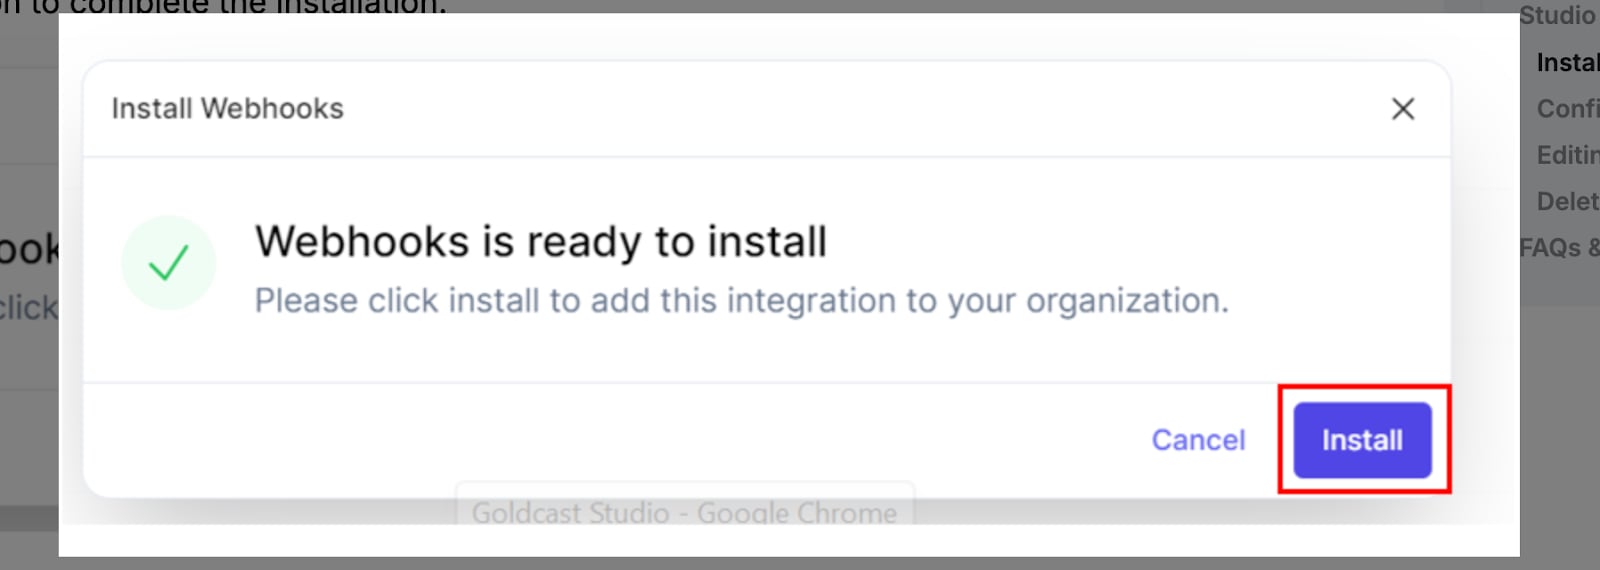
Installation Process:
- After clicking, you will be redirected to Goldcast Studio’s Integrations page.
- A pop-up titled Install Webhooks will appear—click the Install button.
-
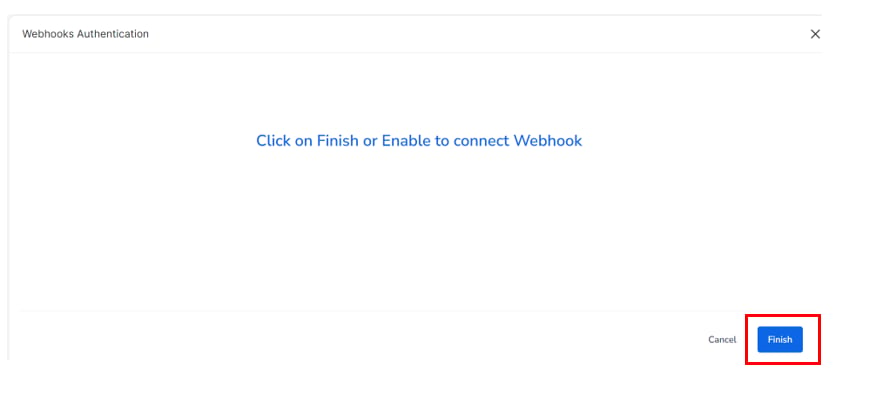
Authentication and Confirmation:
- You will see a confirmation pop-up after the installation.
- Complete the authentication process on the next screen, then click Finish to finalise the set

Step 2: Configuring the Webhook for a Webinar
-
Create a Test Webinar:
- Log in to Goldcast Studio with your credentials.
- Navigate to the Events tab, create a new test webinar (select any upcoming date and time you prefer), then open that test webinar’s Event Dashboard.
-
Access the Integrations Section:
- Open the Integrations tab within the dashboard.
-
Go to Webhooks:
- On the Integrations page, select the Webhooks option.
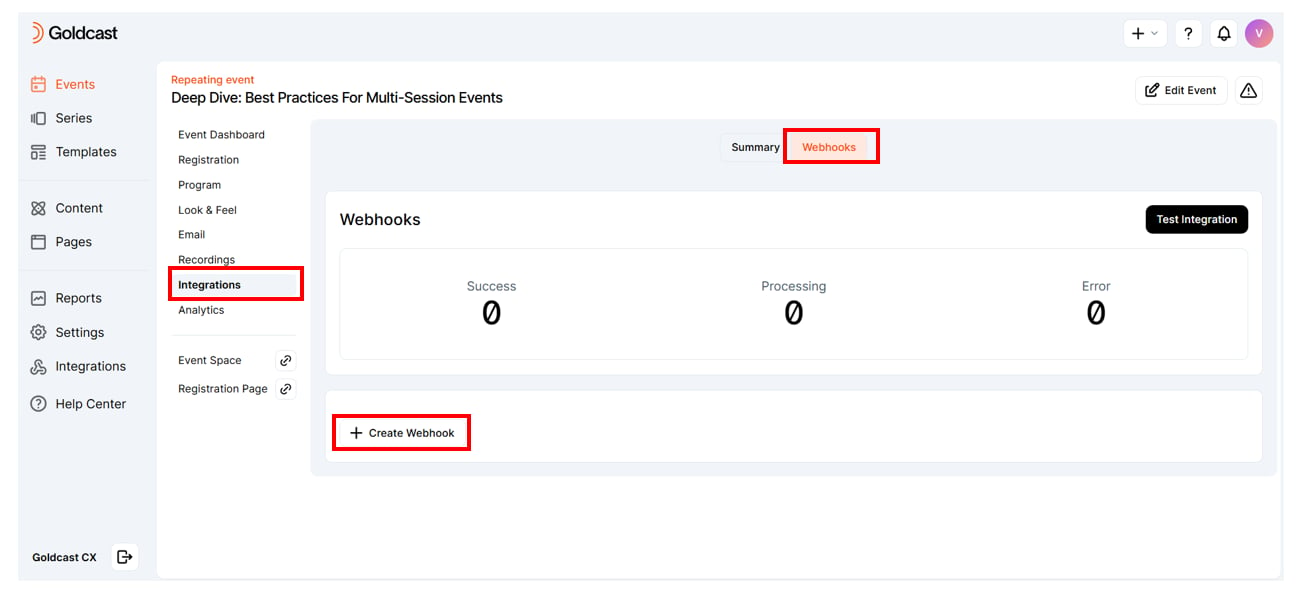
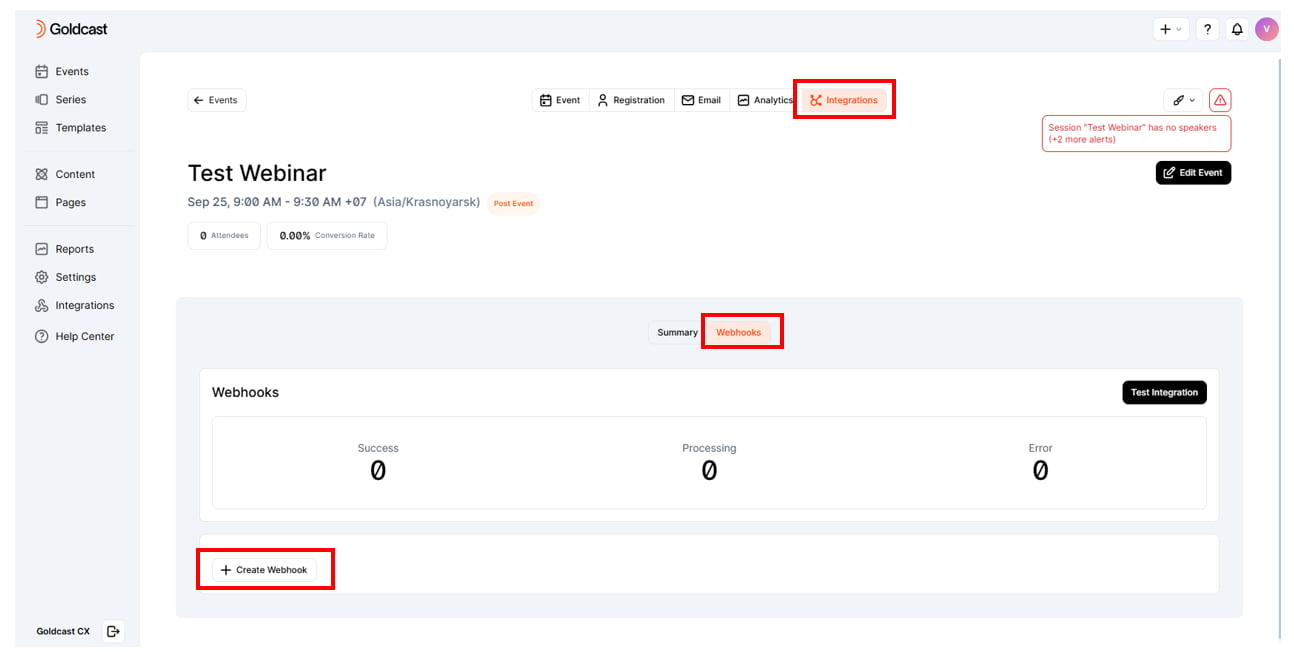
- Create a New Webhook:
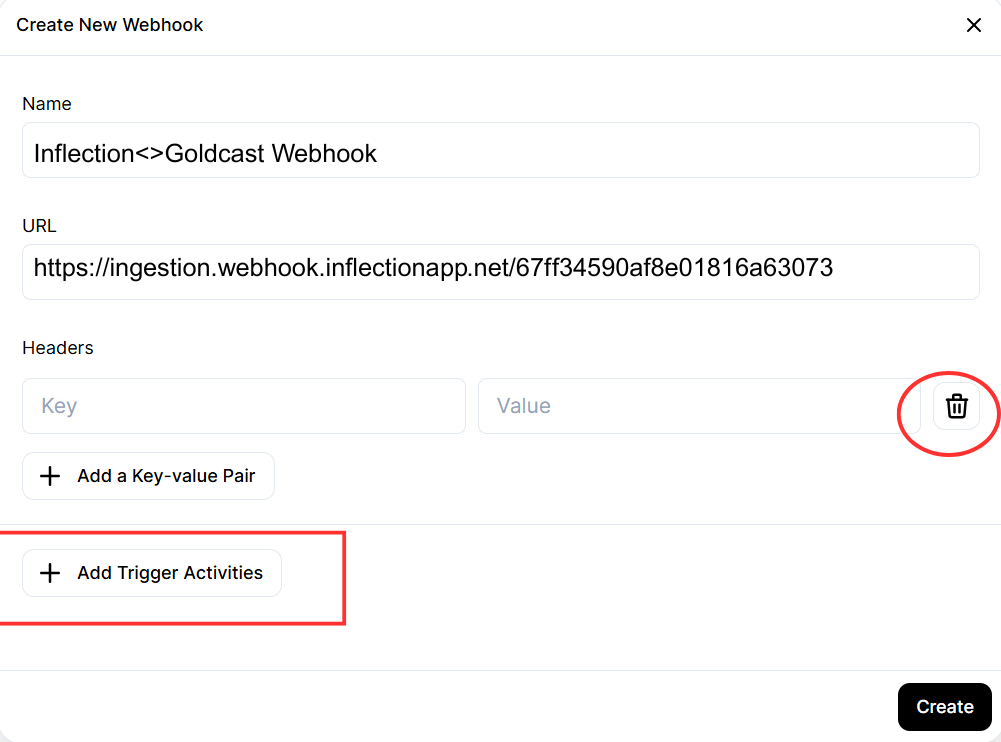
- Click the Create Webhook button to open the configuration popup.
- Name: Enter a descriptive name (for example, “Inflection<>Goldcast Webhook”).
- Webhook URL→ Paste the Webhook URL generated from Inflection.
- Headers: Leave this field blank as authentication is not required for this test.
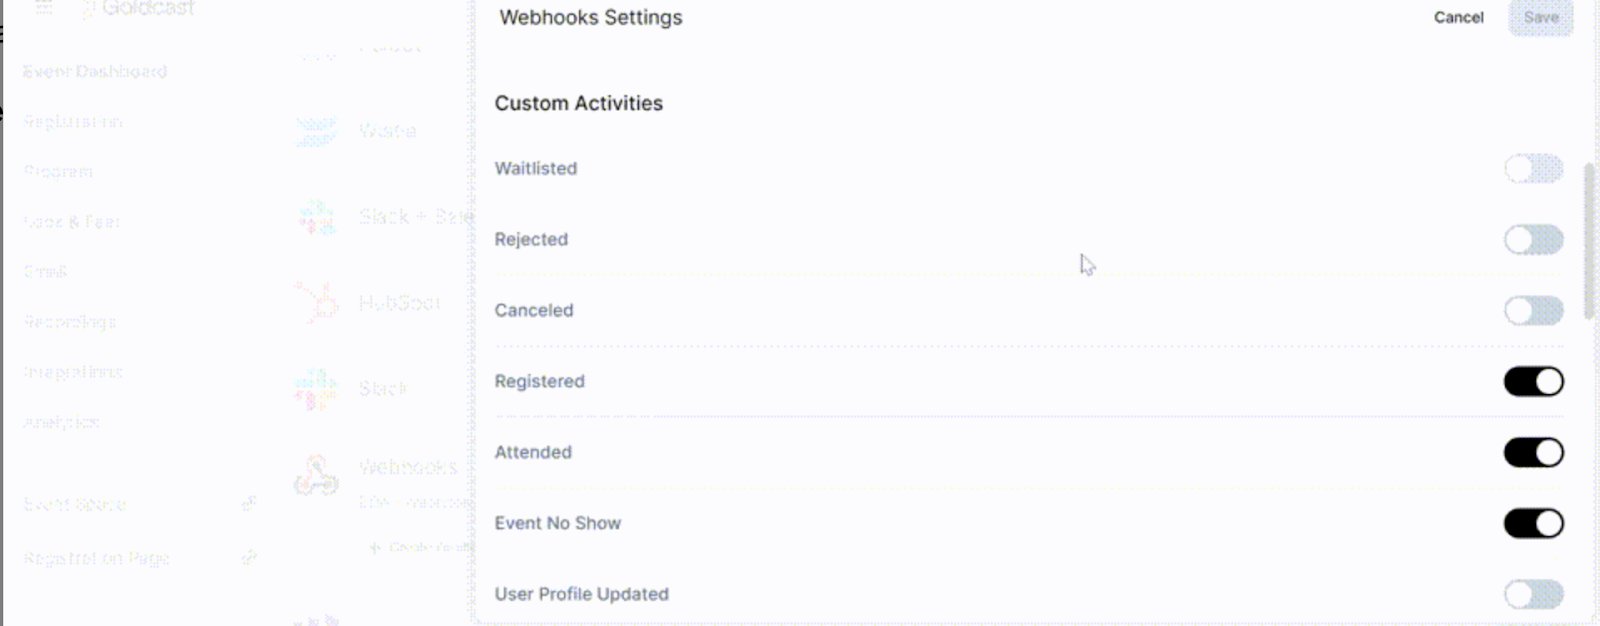
- Trigger Activities: Toggle the options for Registered and Attended to activate them.
-
Finally, click Create to save your new webhook configuration.
Connection details & field mapping
Connection details & field mapping
When a trigger activity occurs, Goldcast sends the data to Inflection.You can view the submission count on the Connection Details page.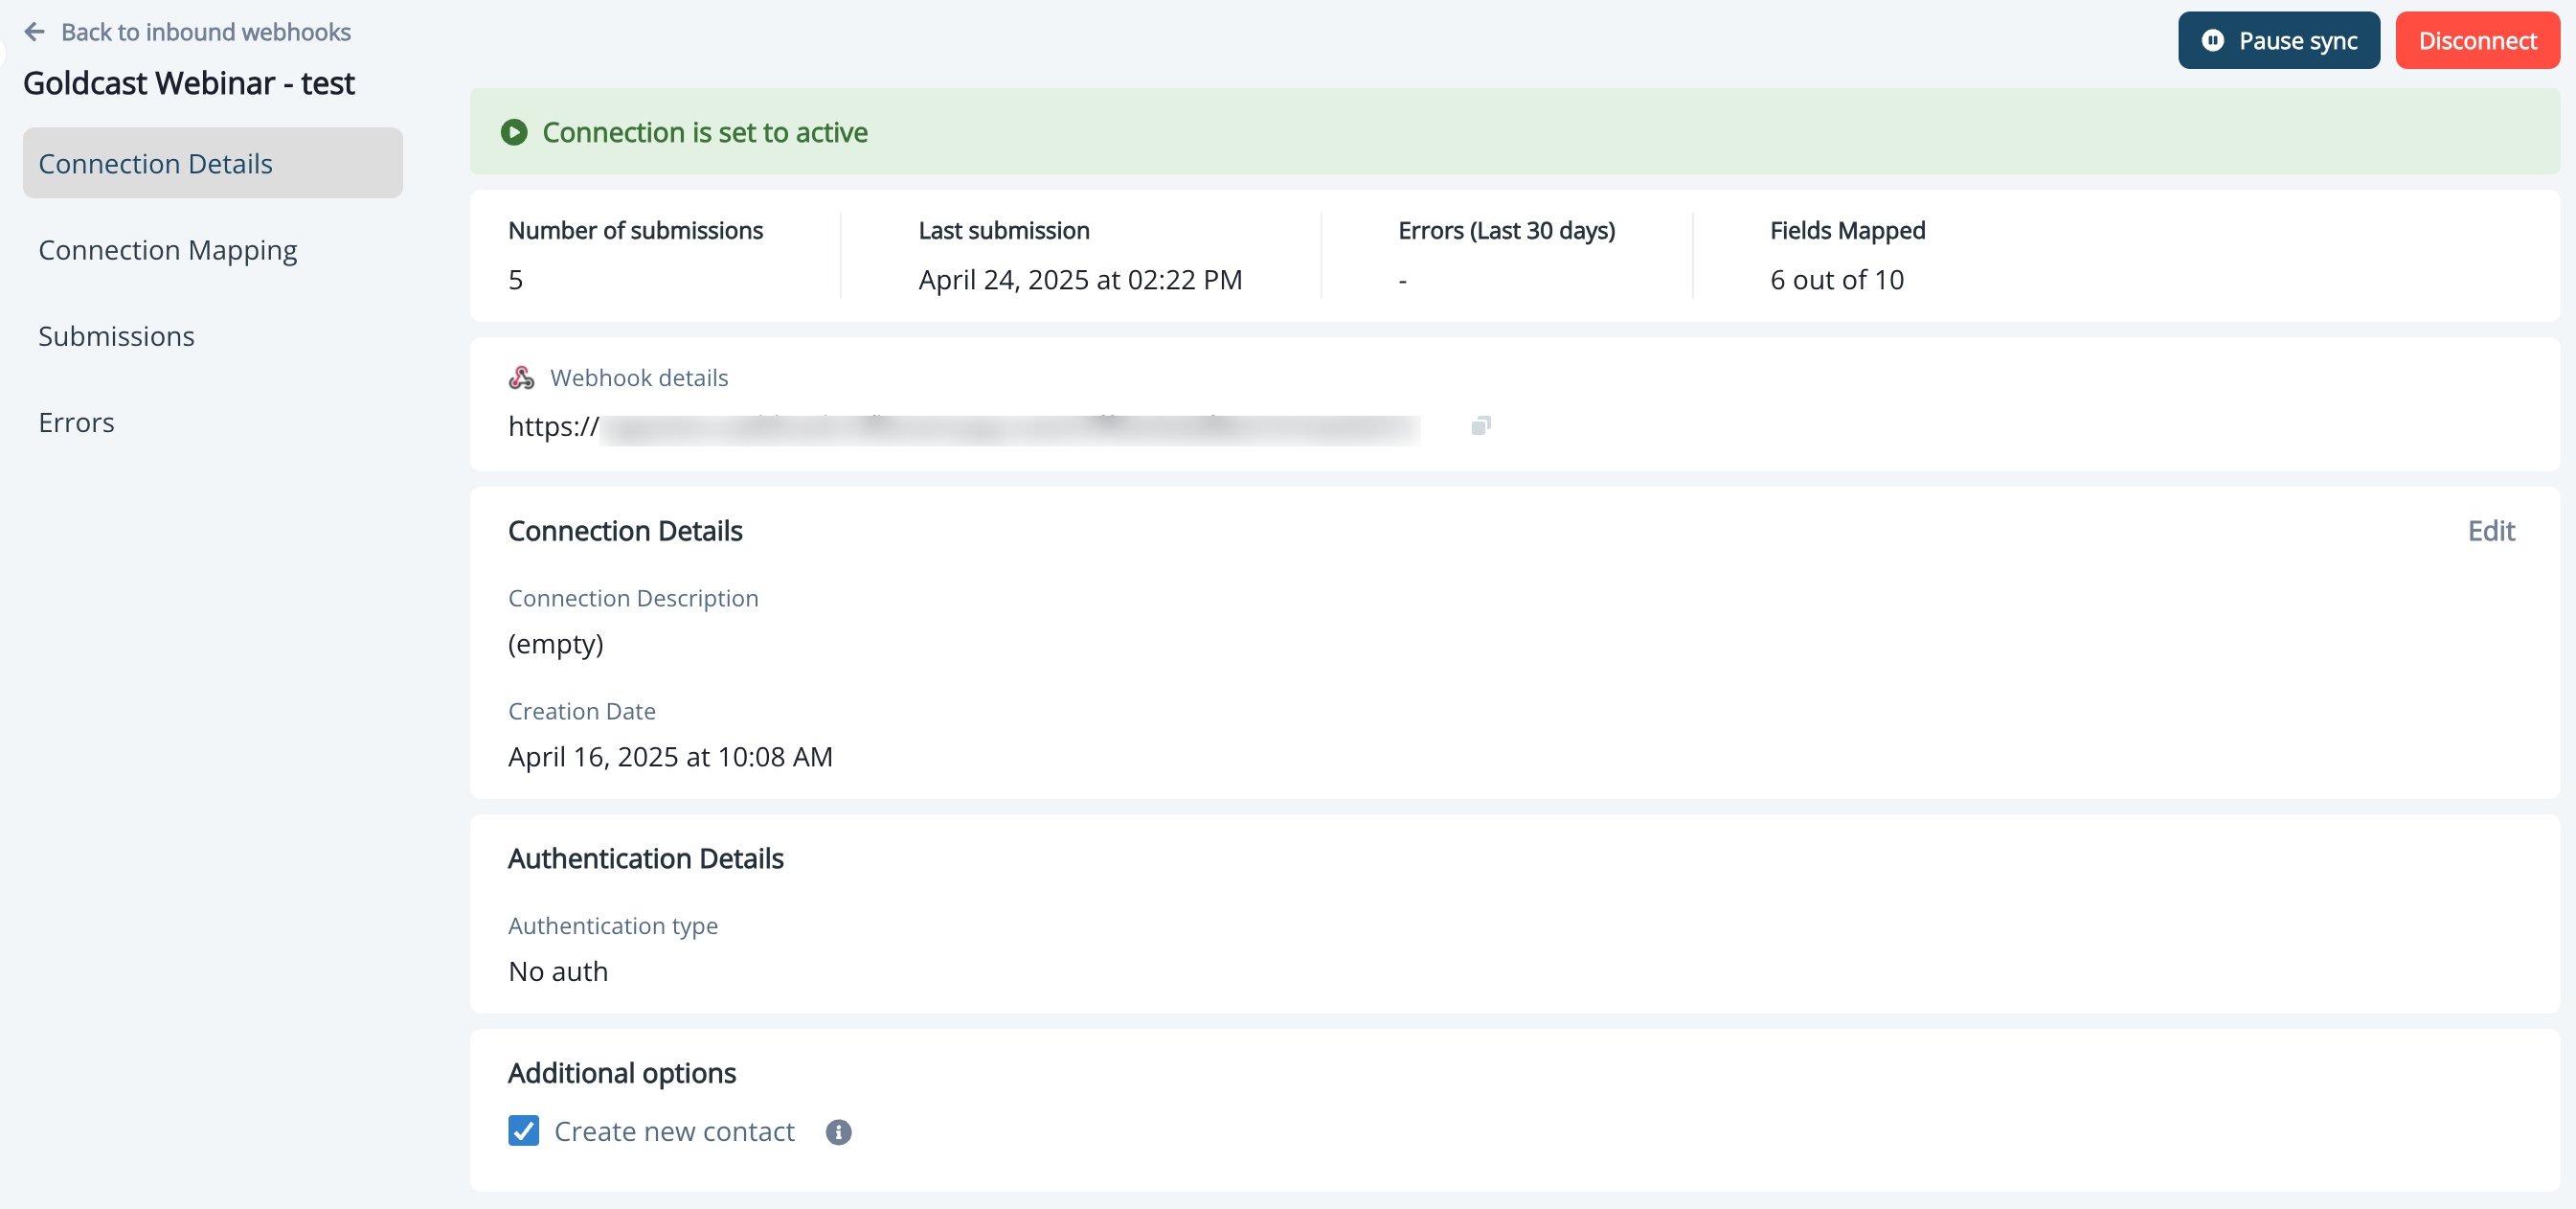
Step 1 - Enable fields for mapping
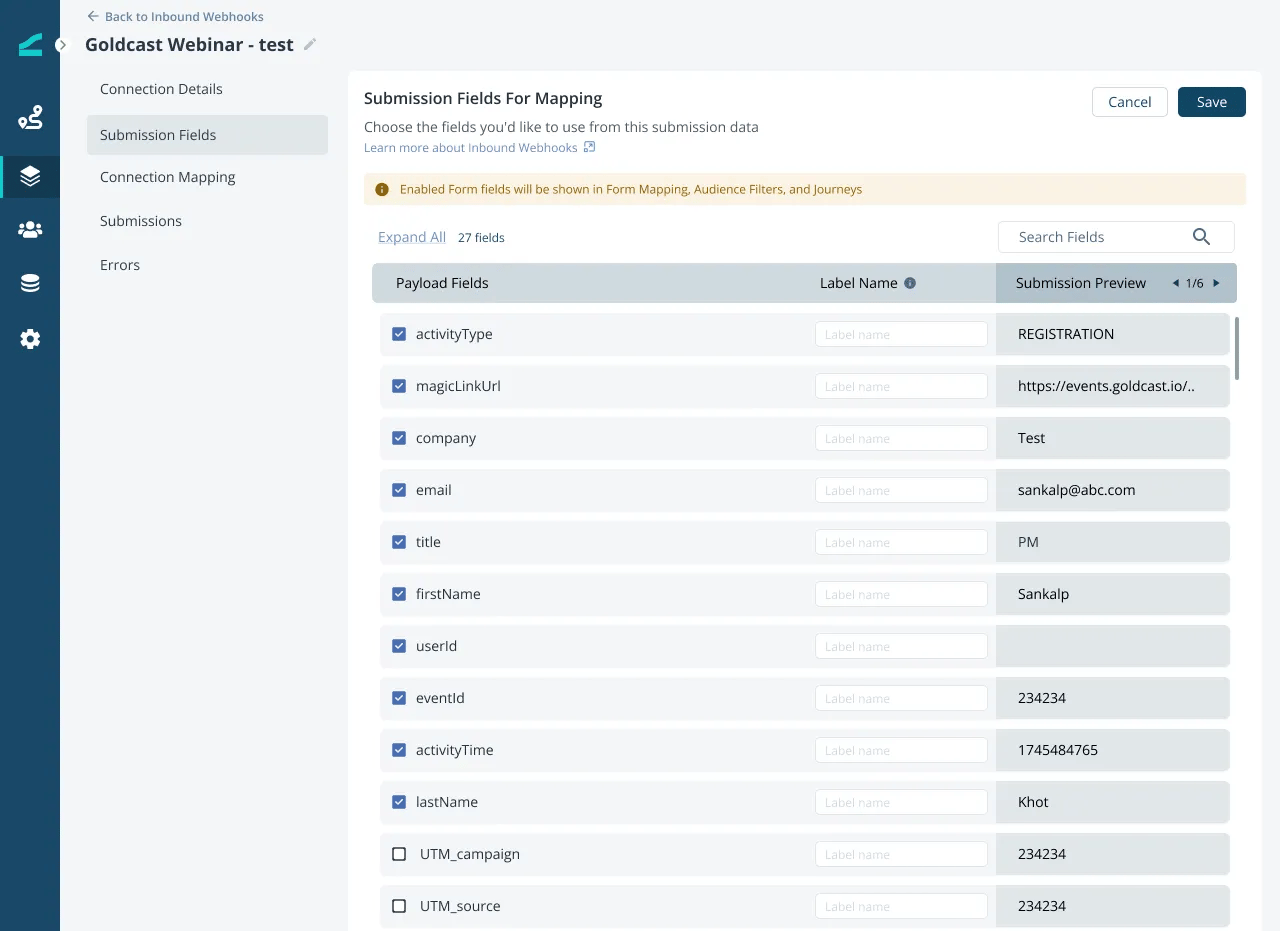
- Go to “Submission Fields” tab
-
Enable the required fields and click Save.
Step 2 - Mapping fields
- Go to “Connection mapping” tab and click on “Edit”
- Here you can define mapping for goldcast submission fields to Inflection contact fields.
-
Additionally, map other essential fields like
magicLinkUrl -
magicLinkUrlis the unique invitation link for each user. You can later use it in email campaigns sent via Inflection.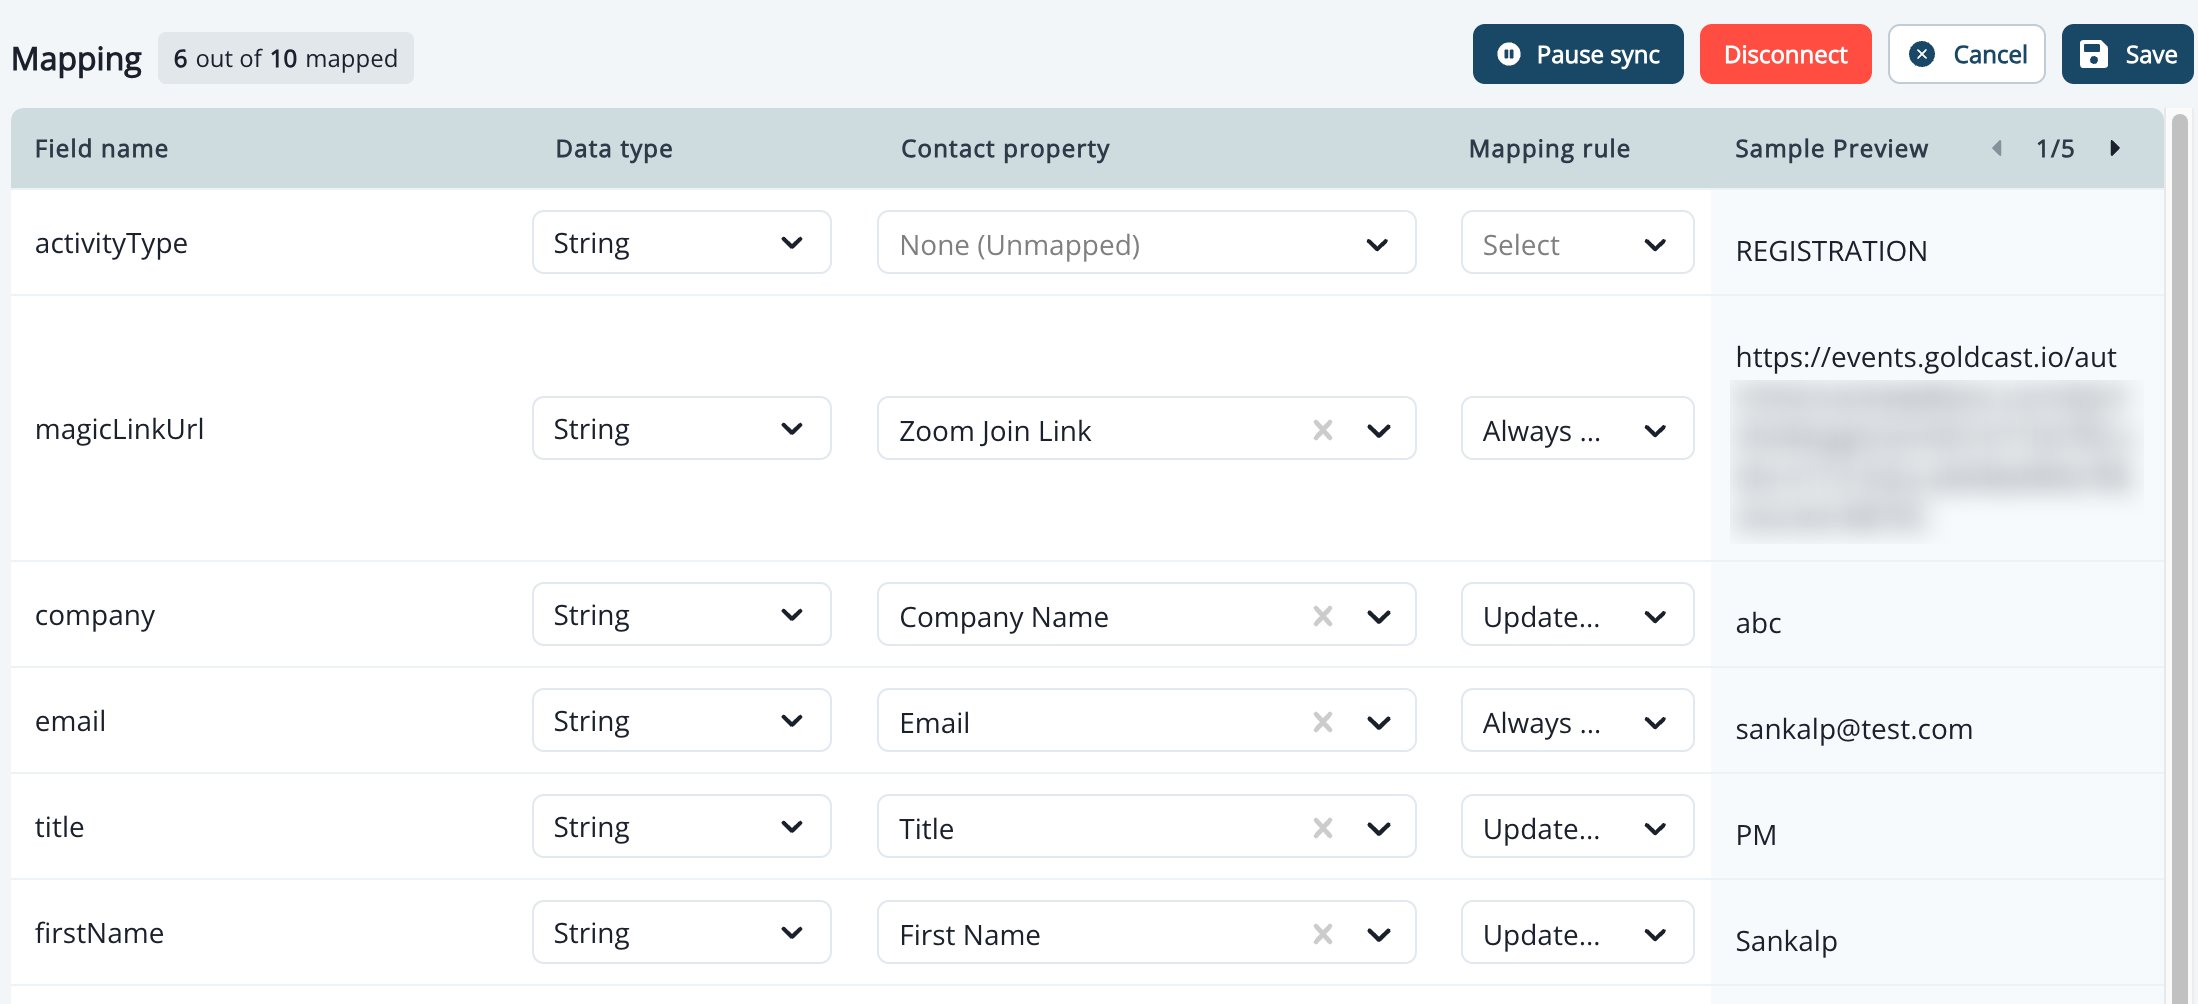
- New contacts will be created in Inflection for each unique email.
- Contact fields will be updated accordingly.
- Once the Email field is mapped, you can use submission data for journey targeting.
Targeting contacts
Targeting contacts
You can use Goldcast submissions within Journeys as shown below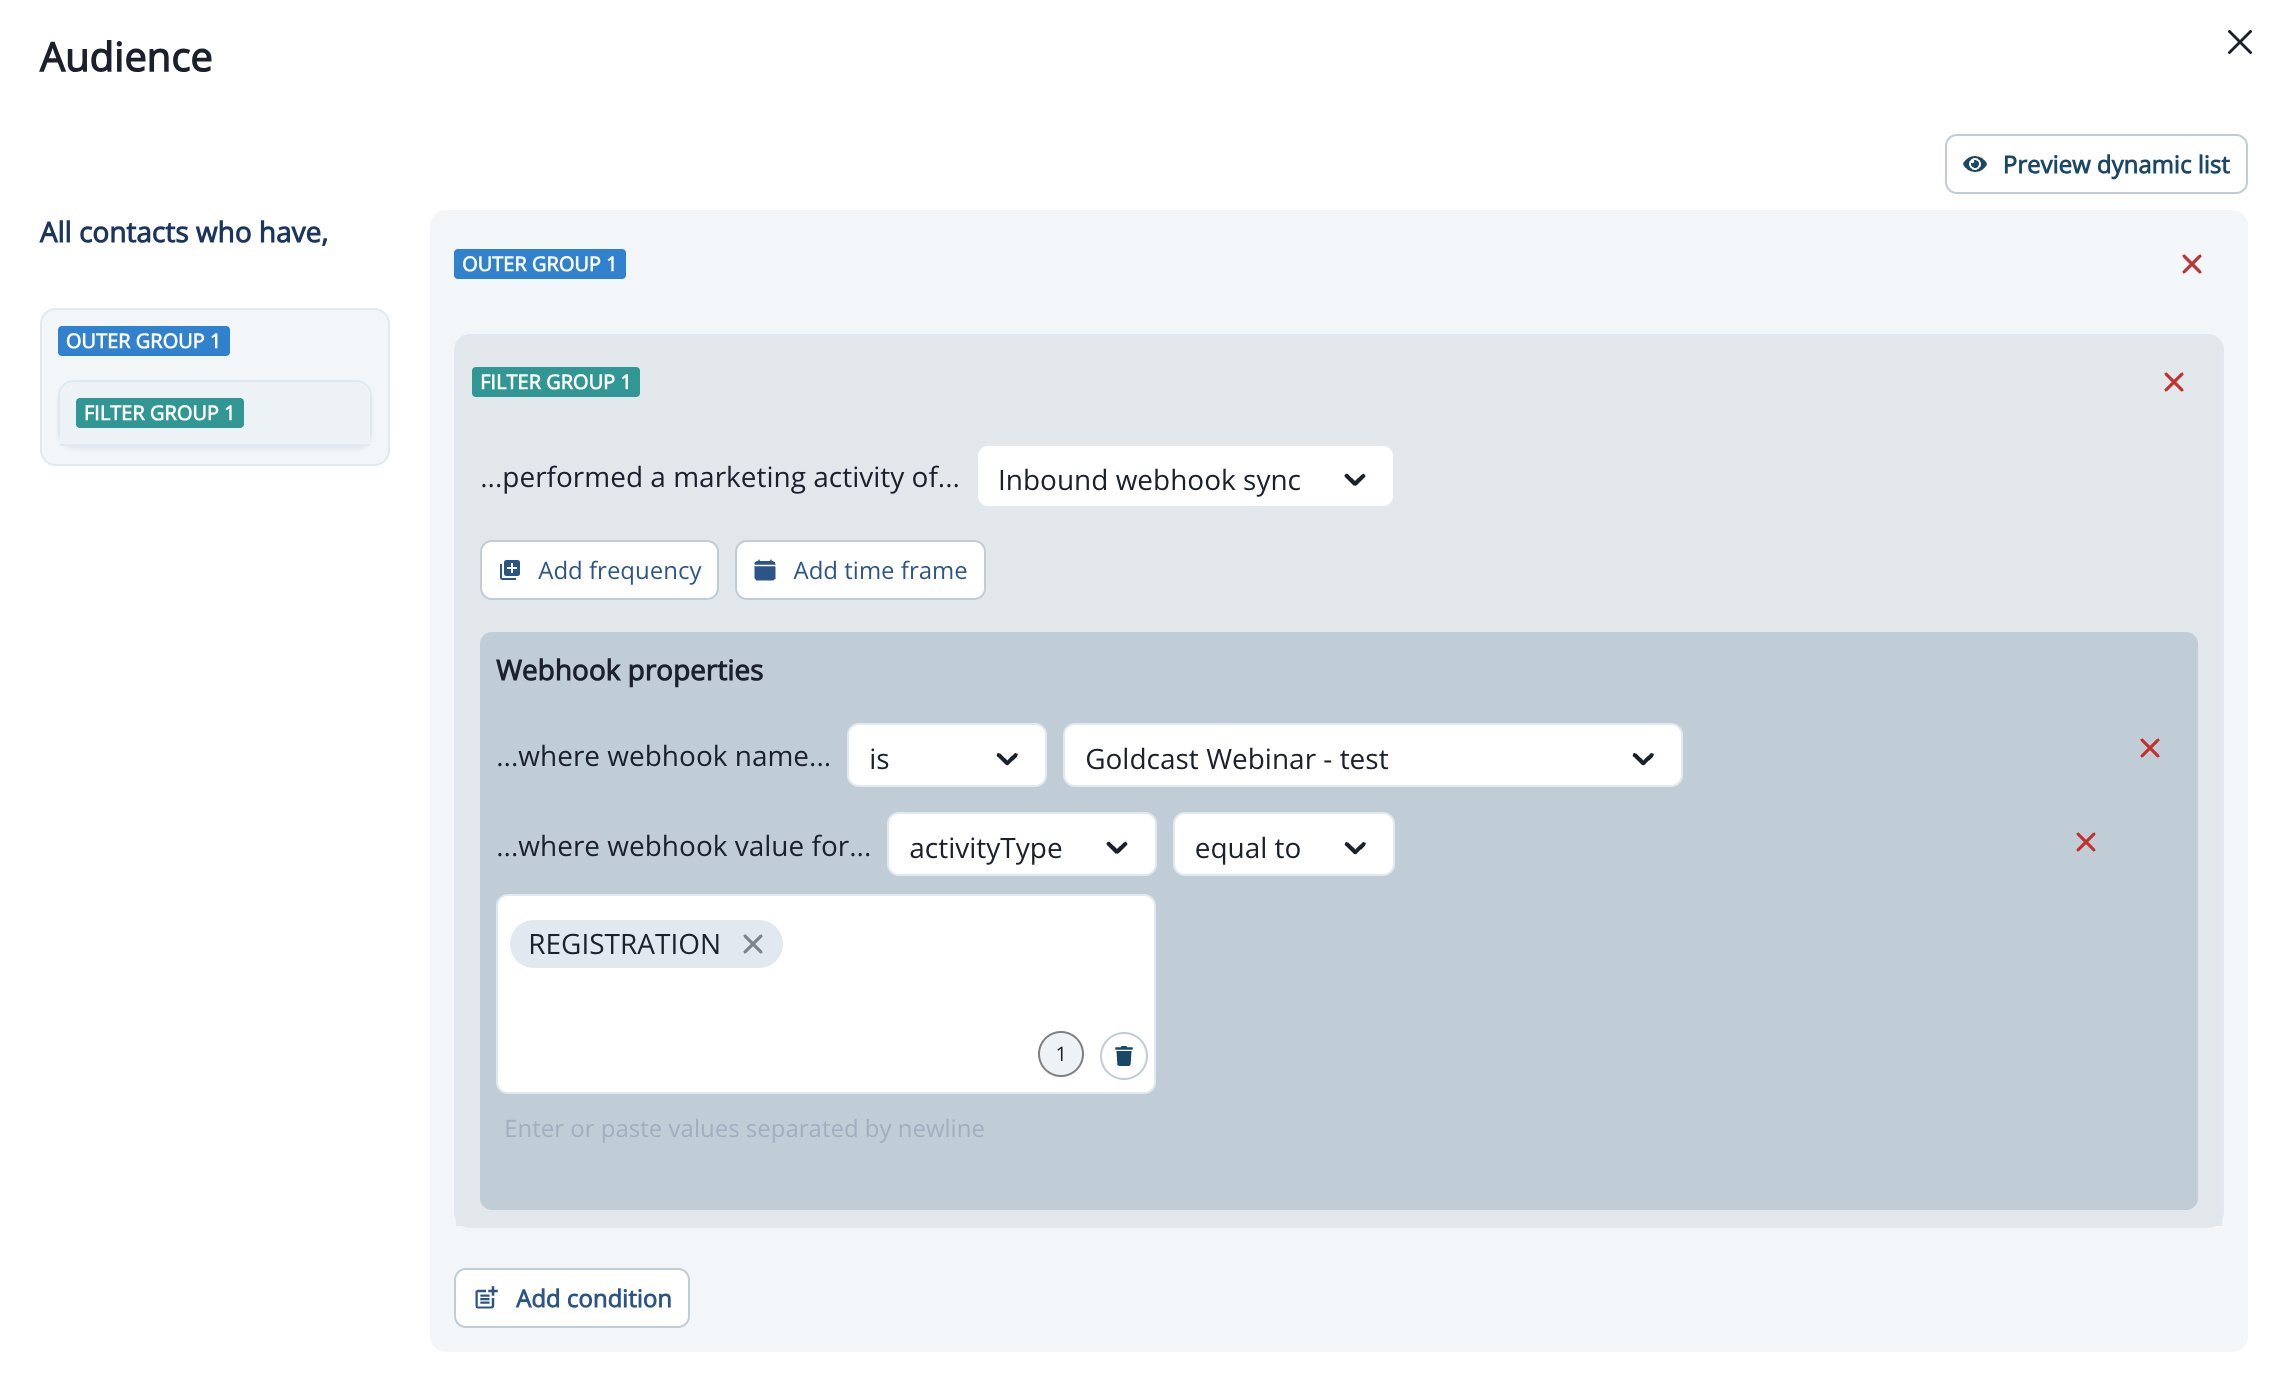
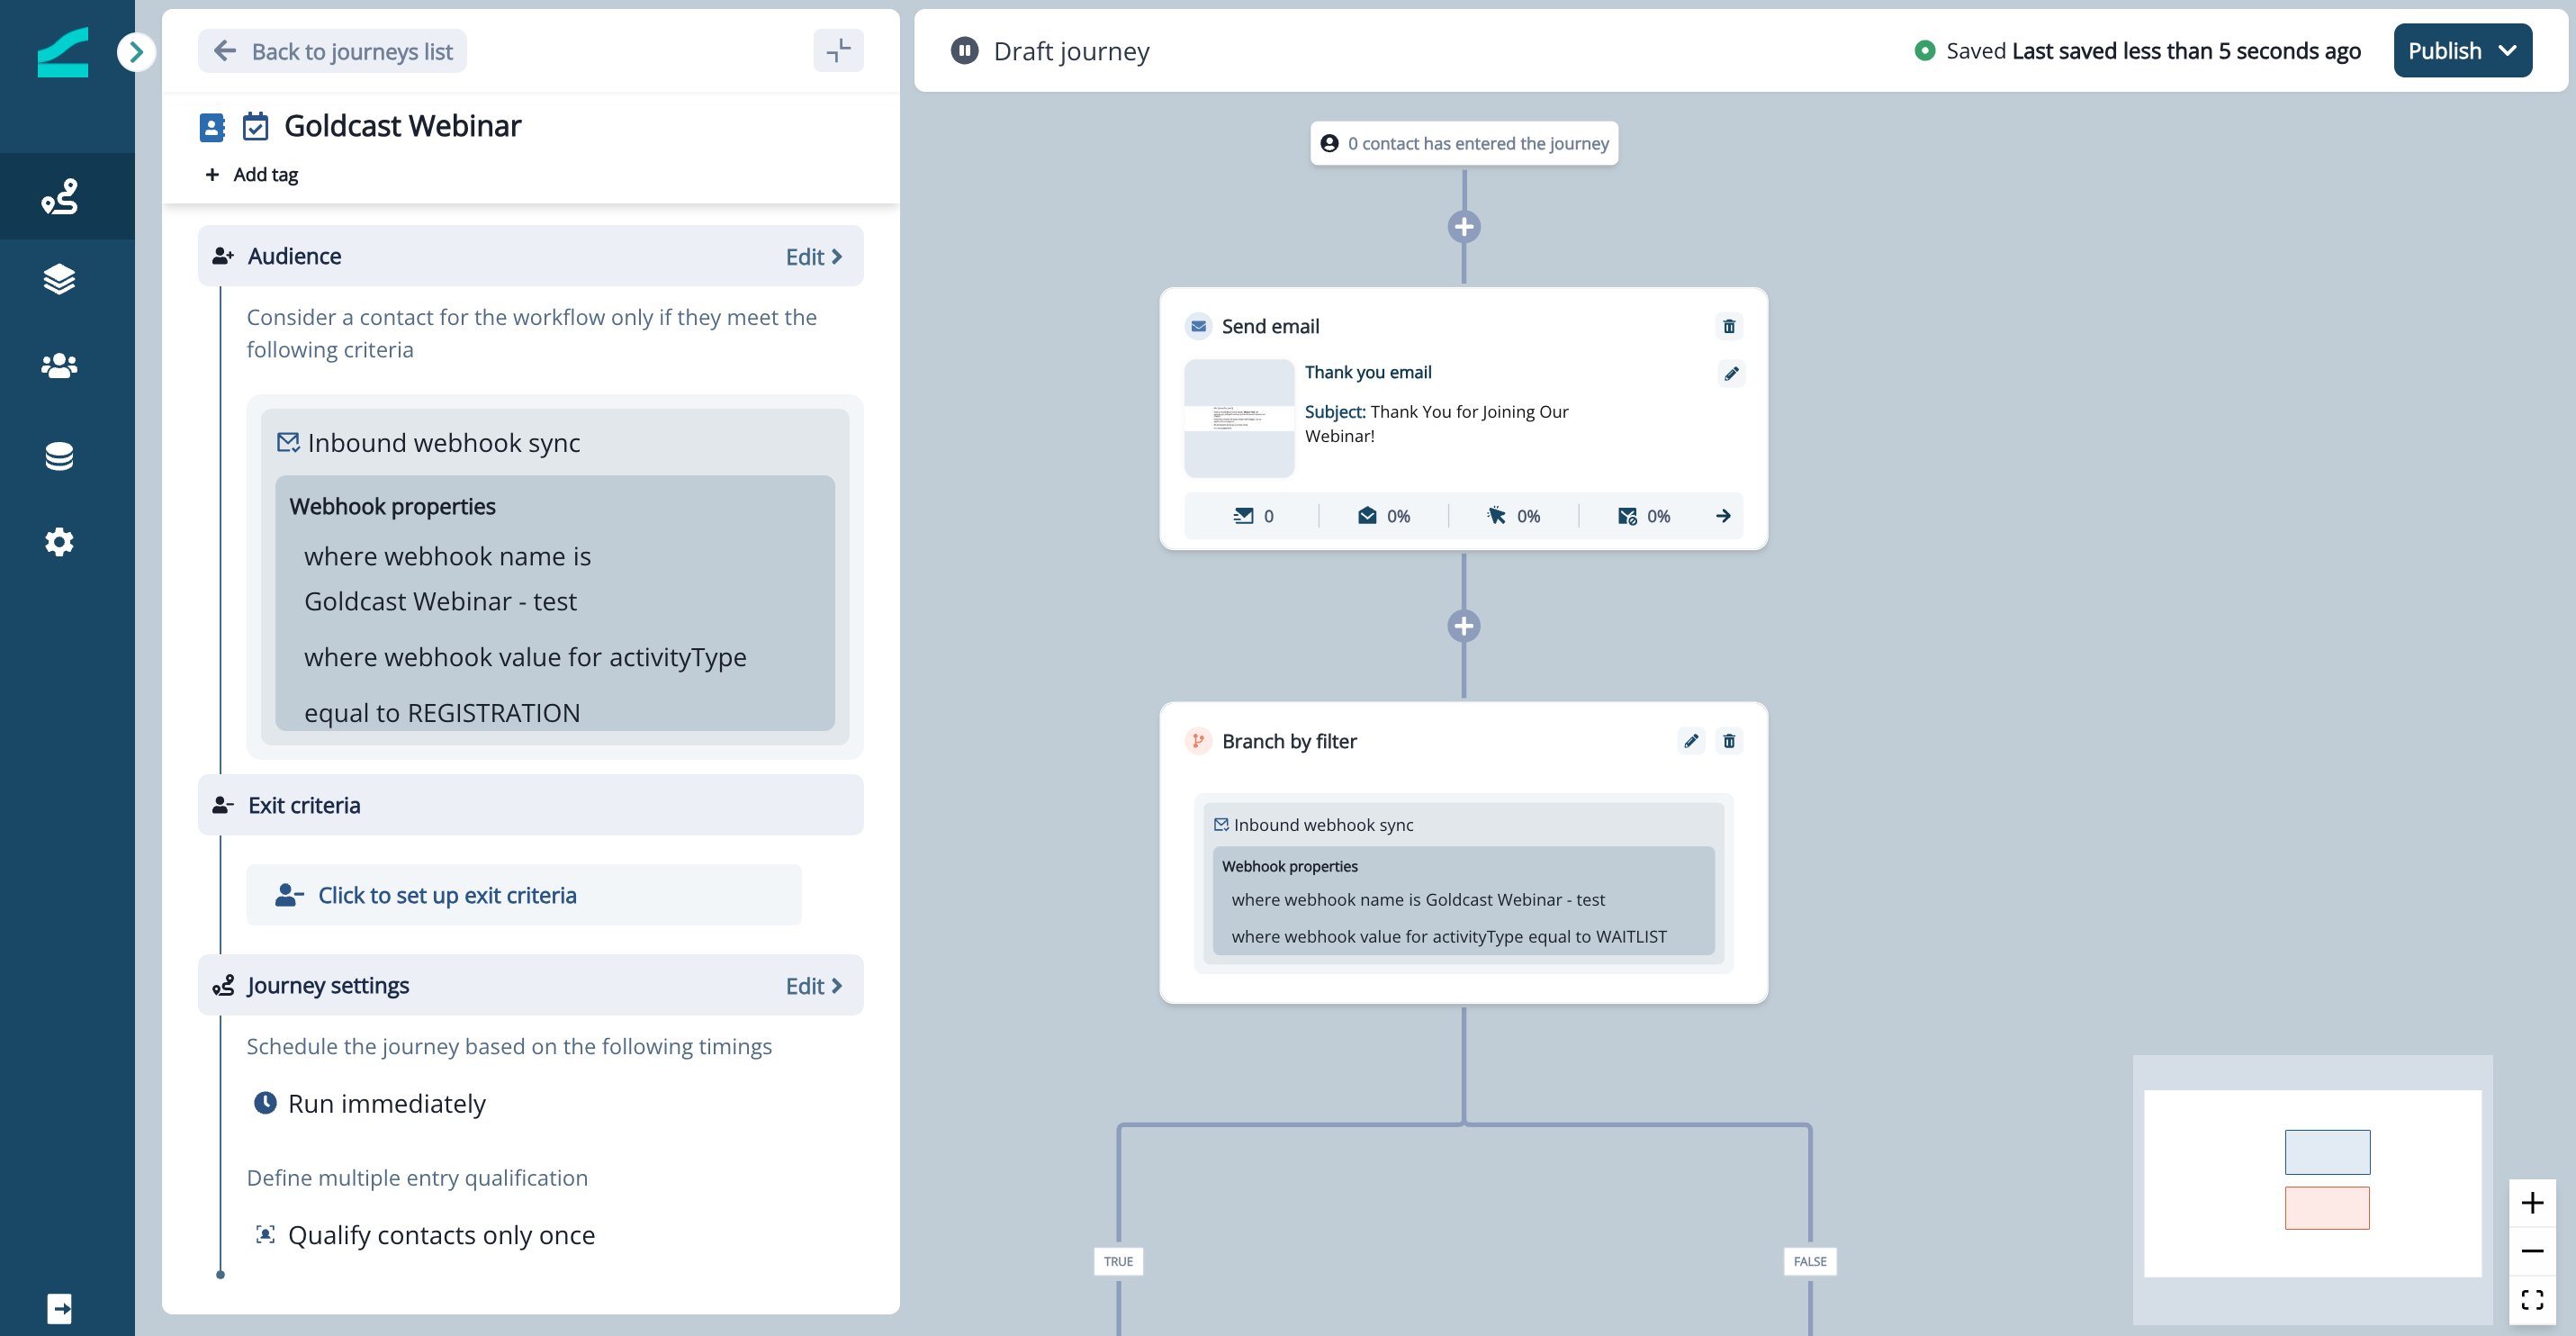
- Navigate to: Journeys → Create New Journey
- Add a condition: Performed a Marketing Activity → Inbound Webhook Sync
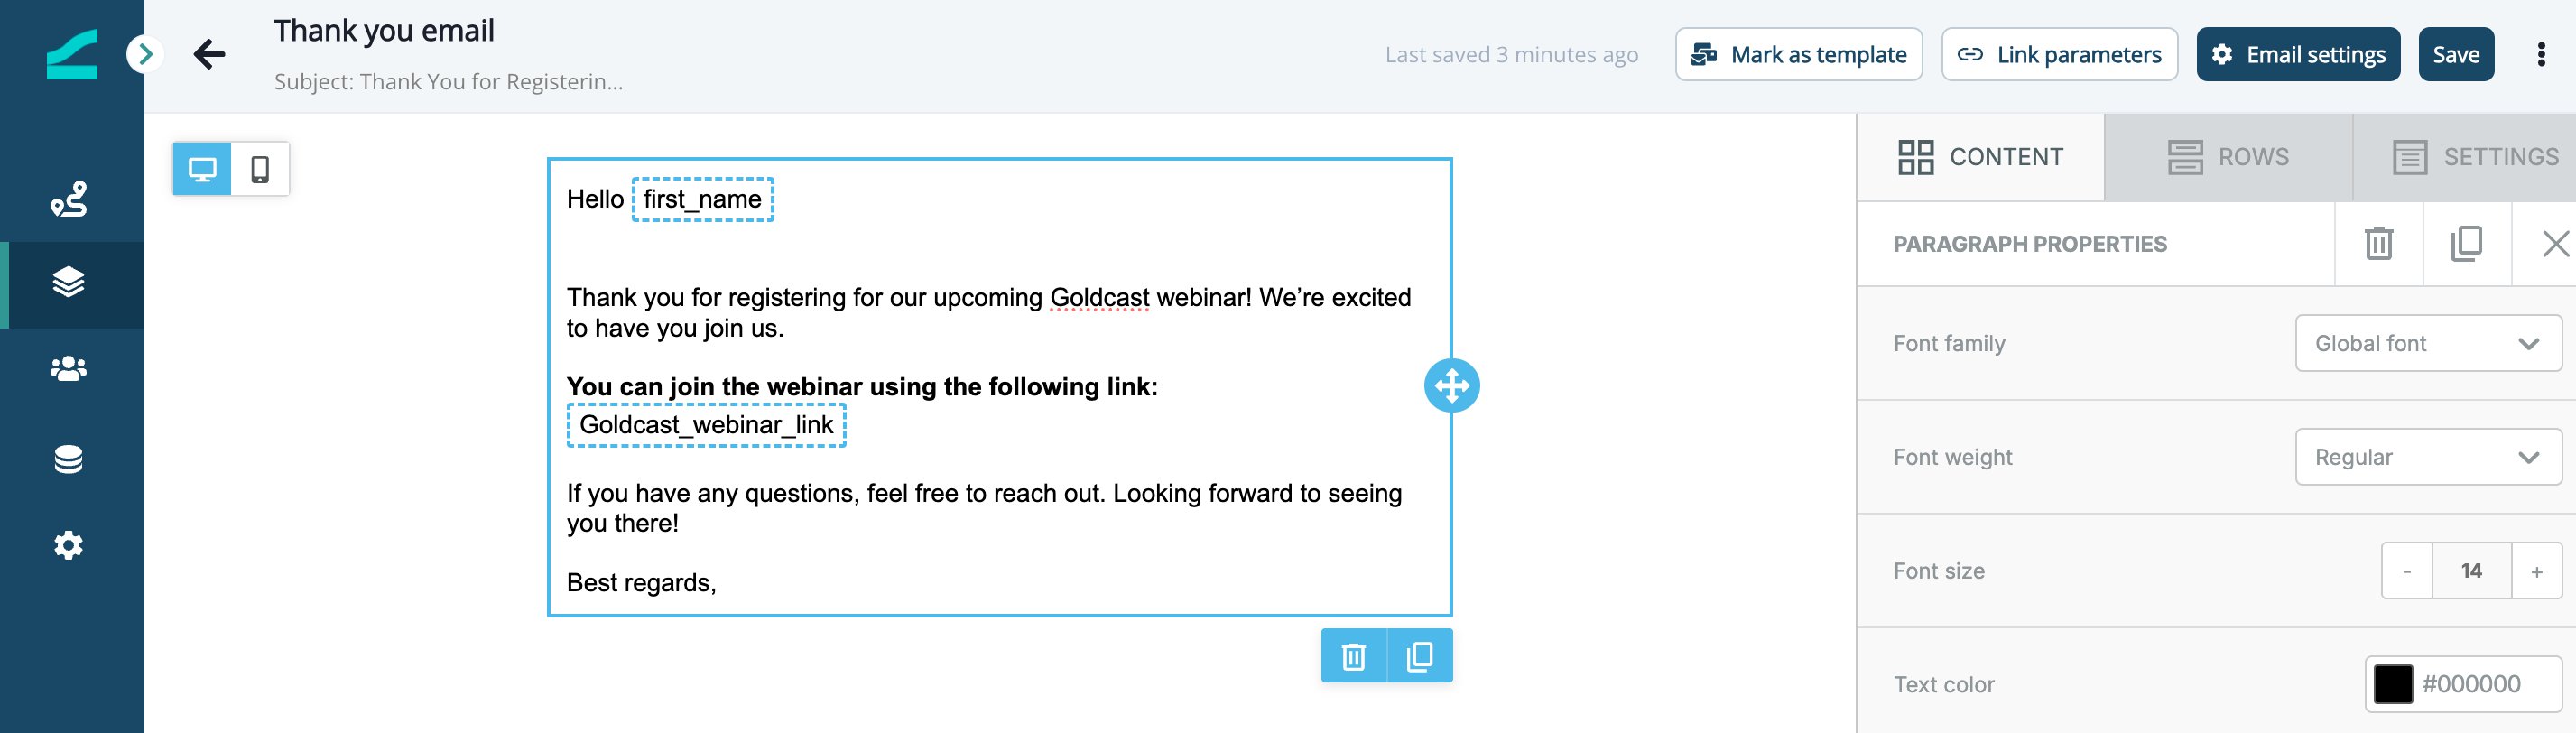
Create email with tokens
You can personalise emails for sending -- Registration confirmation
- Follow-ups
- Feedback requests
-
And more…
References
References
Goldcast Webhooks Integration Help: Webhooks IntegrationList of events - Goldcast Event Engagement ActivitiesAll payloads - Goldcast Webhooks Payload Structure